How to re-enroll contacts in workflows
Last updated July 9, 2025
Re-enrolling contacts in a workflow is useful when you want them to go through the same process again, or have them go through a new or updated workflow.
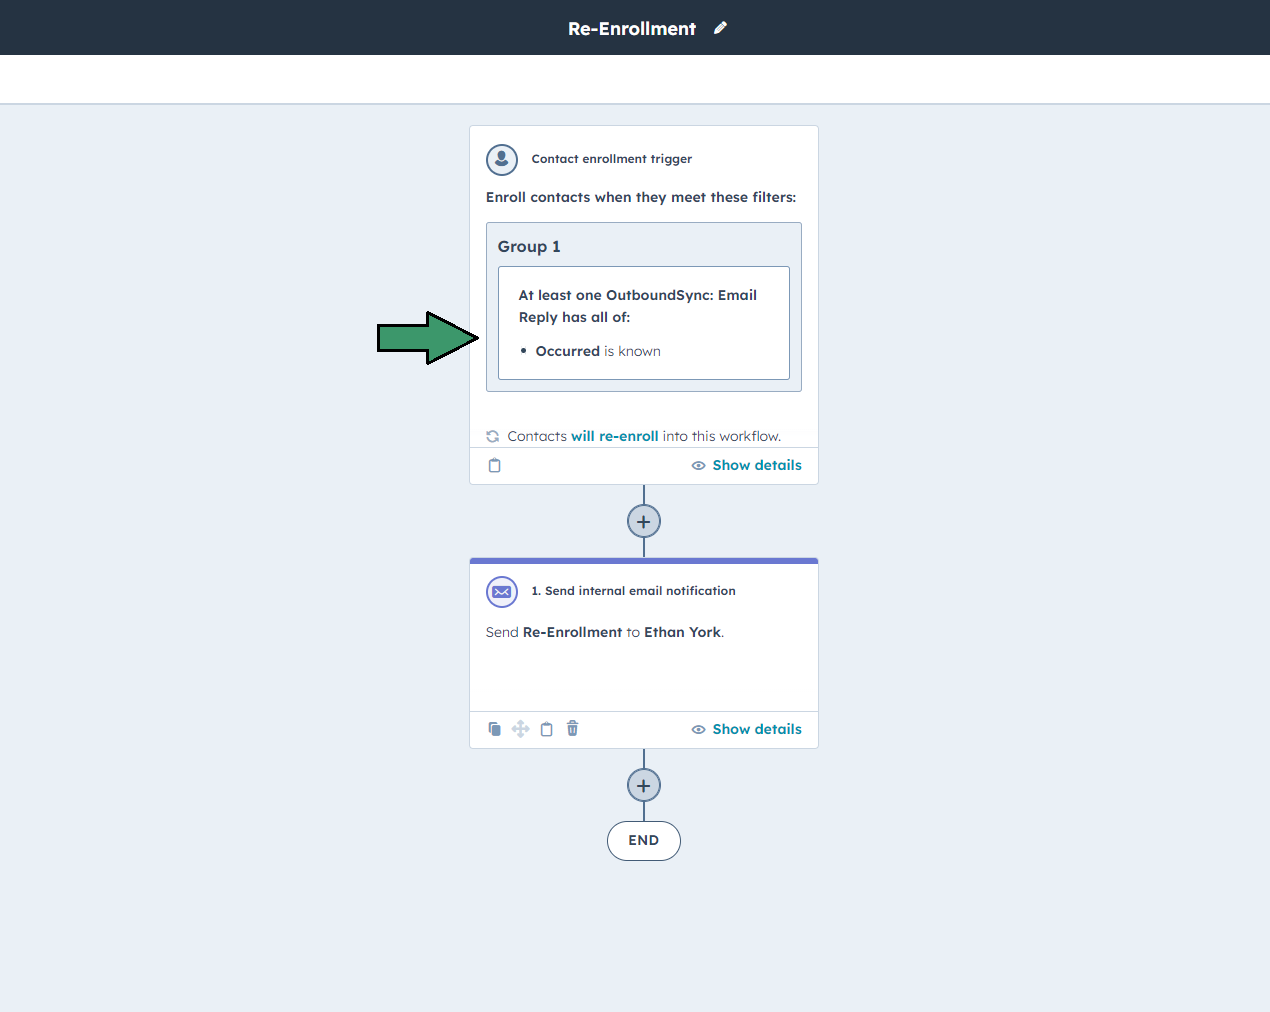
For OutboundSync in particular, this would be useful if you want to re-enroll contacts every time a reply is received.
- Navigate to your HubSpot dashboard.
- Go to the Automation tab and select Workflows.
- Find and open the workflow in which you want to re-enroll contacts.
Steps to Re-Enroll Contacts
Enable Re-enrollment
In the workflow editor, click on the trigger that enrolls contacts.
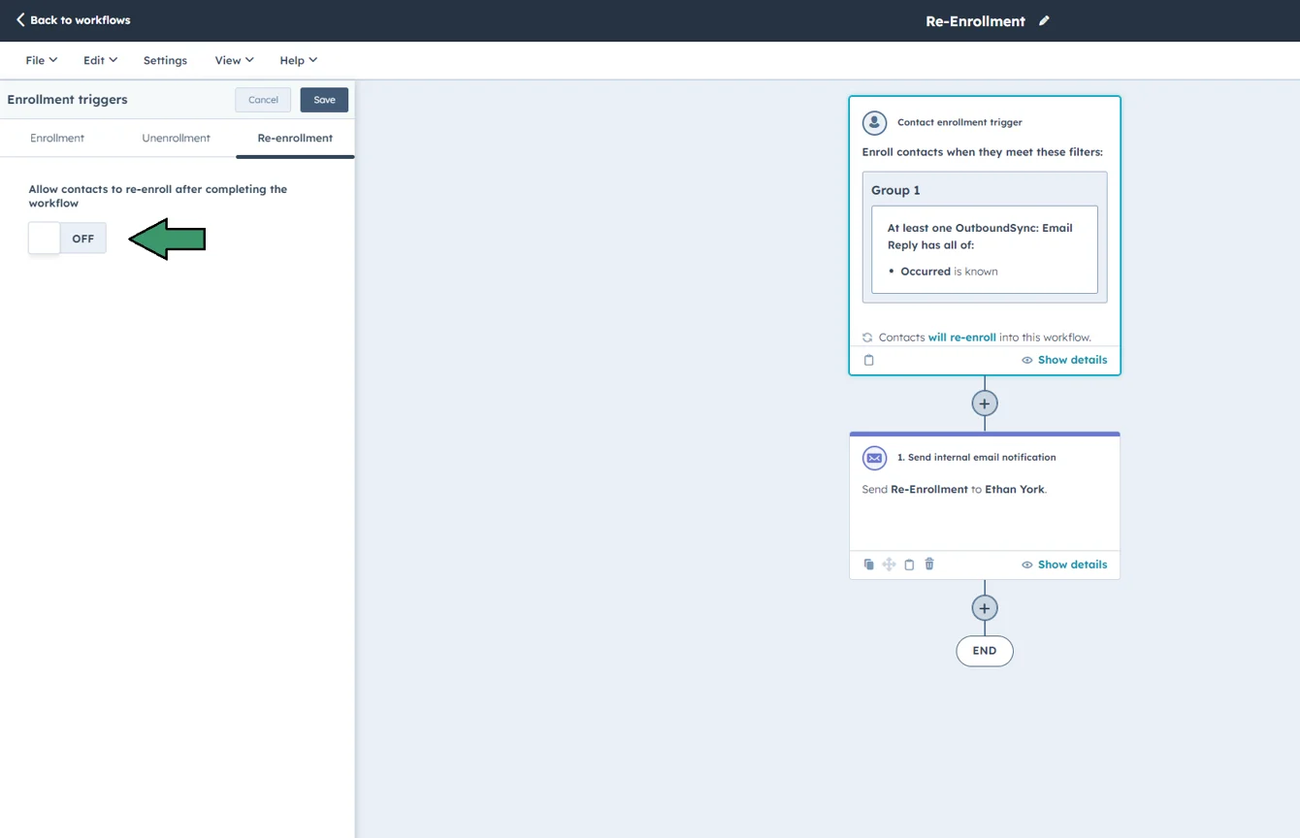
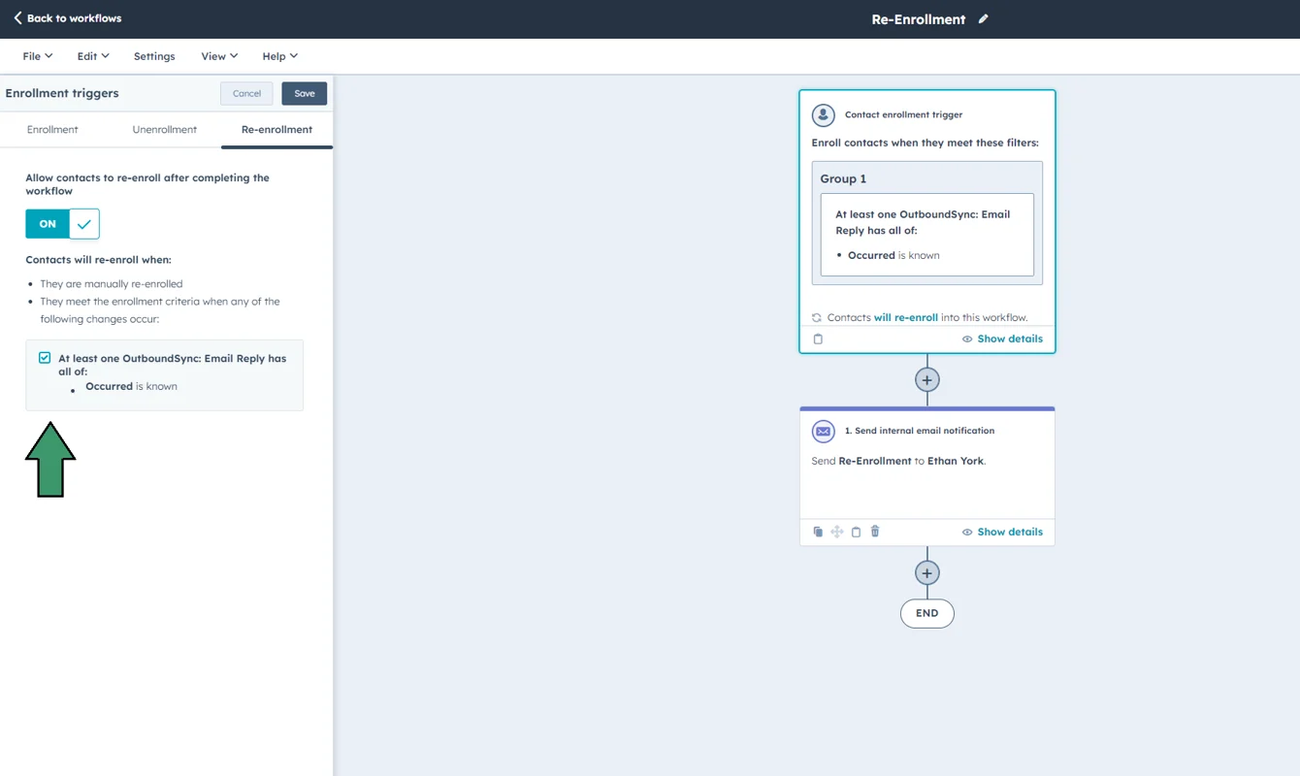
Select the Re-enrollment tab, then enable the “Allow contacts to re-enroll after completing the workflow” option.
Choose the specific criteria that will allow contacts to be re-enrolled.
Review Workflow Settings (Optional)
Ensure that the workflow's actions are appropriate for re-enrolled contacts.
Test the Workflow
Use the HubSpot Test feature to simulate the re-enrollment process. Confirm that contacts are being re-enrolled and progressing through the workflow as expected.
Alternatively, you can use OutboundSync’s Testing Modal to test changes to your workflows
Save and Activate
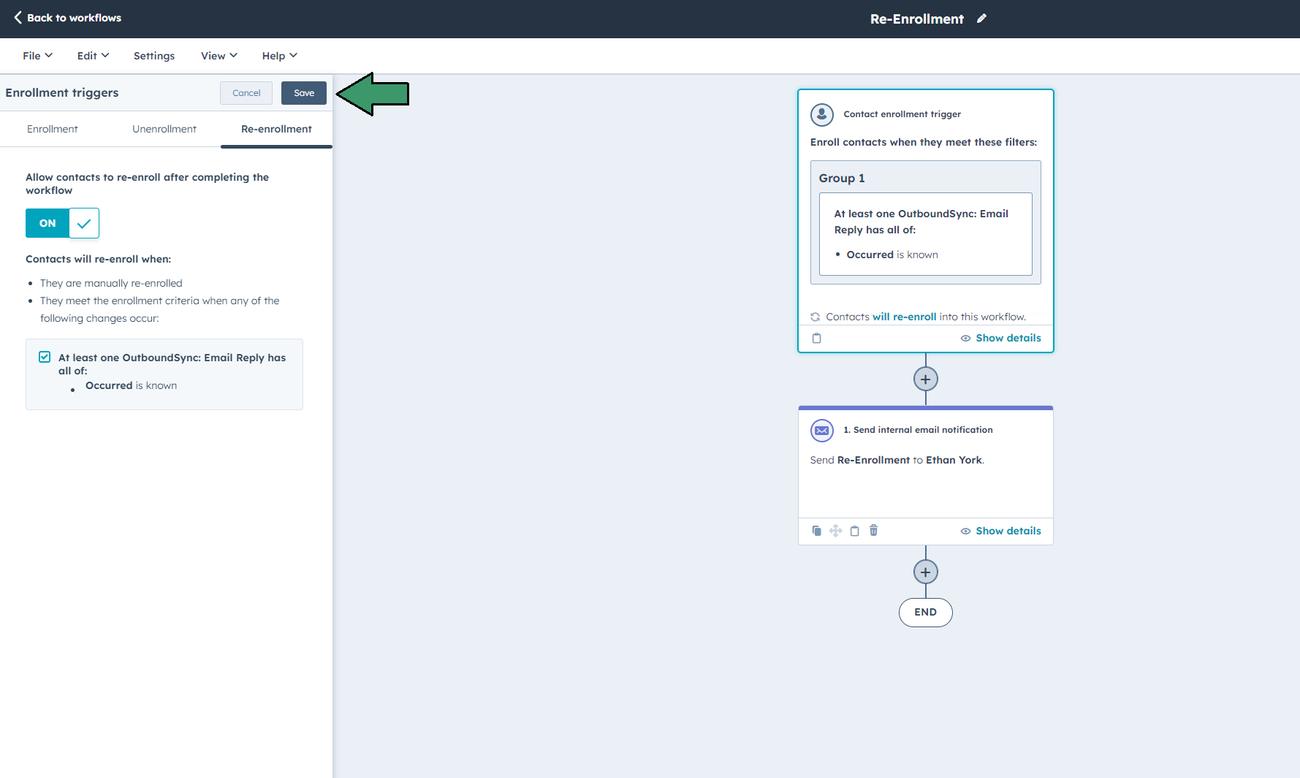
Once you’ve configured the re-enrollment settings, click Save to apply the changes.
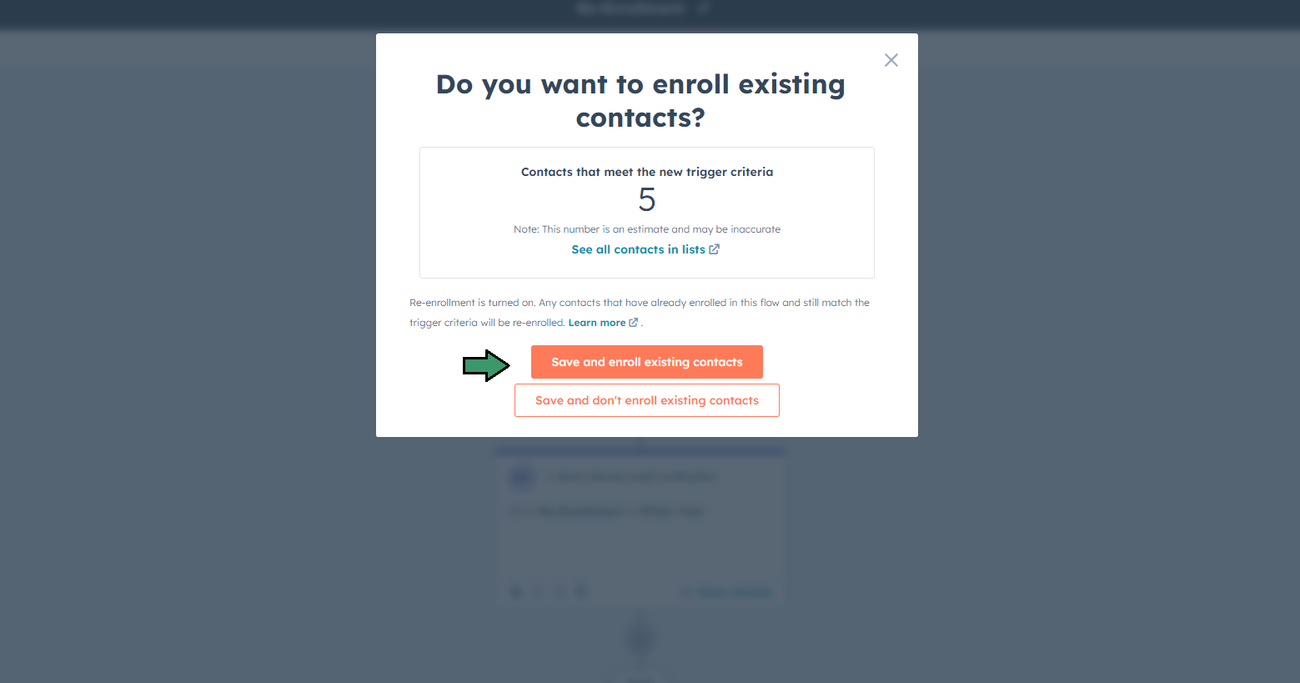
If the workflow is currently active, a display showing the number of contacts that qualify for re-enrollment will appear.
Choose whether you would like to enroll them by selecting “Save and enroll existing contacts”, or you can choose to save without enrolling them.
Finally, activate the workflow if it’s not already live.
Important considerations
- Duplicate Enrollments: Ensure your workflow is designed to handle contacts being re-enrolled without causing issues, such as duplicate tasks or emails.
- Re-enrollment Limits: Be mindful of any limits set by HubSpot on the number of times a contact can be enrolled in a workflow.