How to create reports on converted leads
Last updated July 9, 2025
Tracking contacts converted from the Lead Lifecycle stage in HubSpot is useful for understanding attribution for your outbound campaigns, particularly if you want to compare them to other acquisition channels.
Let's walk identify Contacts that converted from the Lead Lifecycle stage in HubSpot to a more advanced Lifecycle stage.
The first report will look at OutboundSync-created contacts. The second report will look at OutboundSync-influenced contacts that were created by another source in your HubSpot portal.
This article builds on another knowledge base article that explains how to filter OutboundSync contacts in HubSpot .
First steps for both reports
We're going to show to build two reports in this article. Both articles have the same first two steps. Here they are.
Create a single object Contacts report
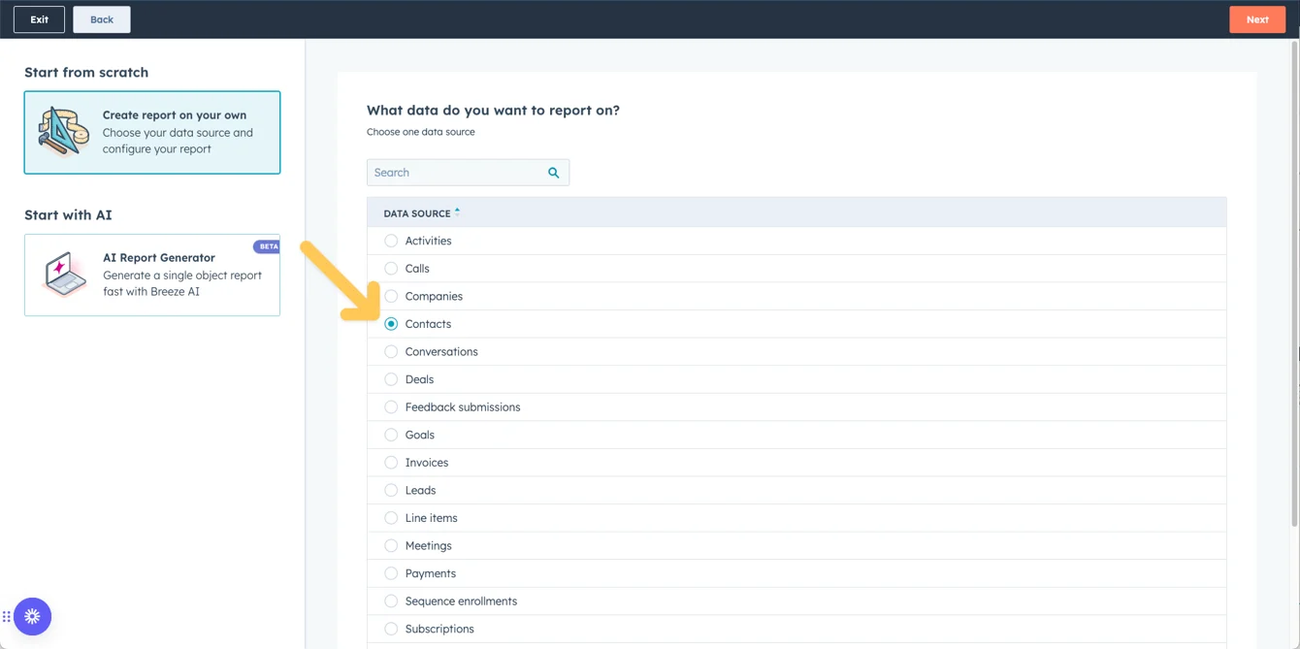
Go to the Reports menu in HubSpot and select a Single object report.
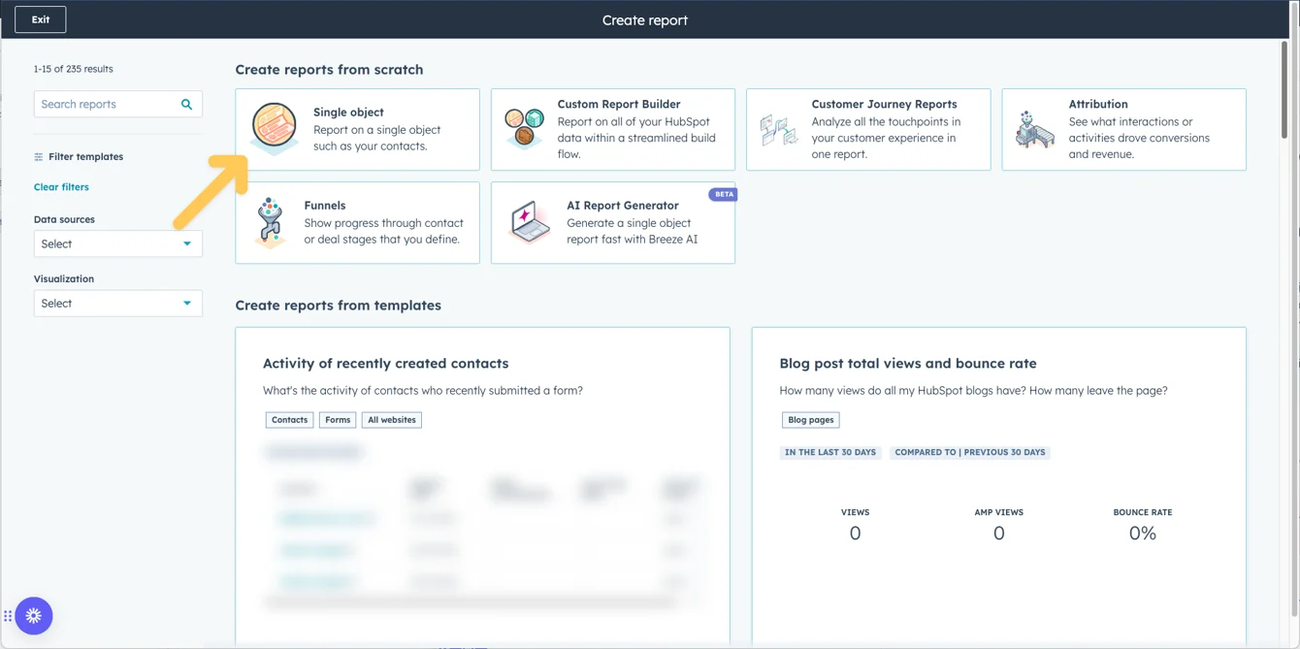
Select Contacts as the data source for this report. The report will be based entirely on properties that are included in the Contact object record in HubSpot.
First touch attribution report
Let's start with contacts that were created by OutboundSync. We are going to consider these first touch attribution.
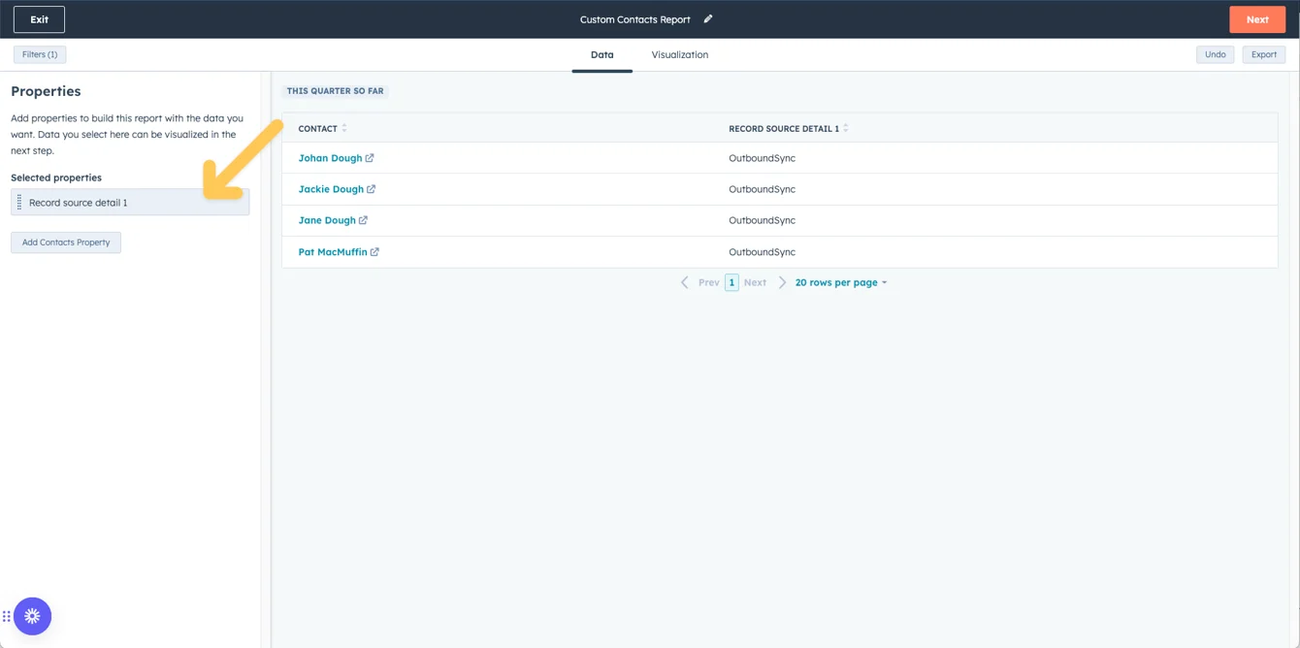
Configure the Data
First, change the Selected properties to include Record source detail 1.
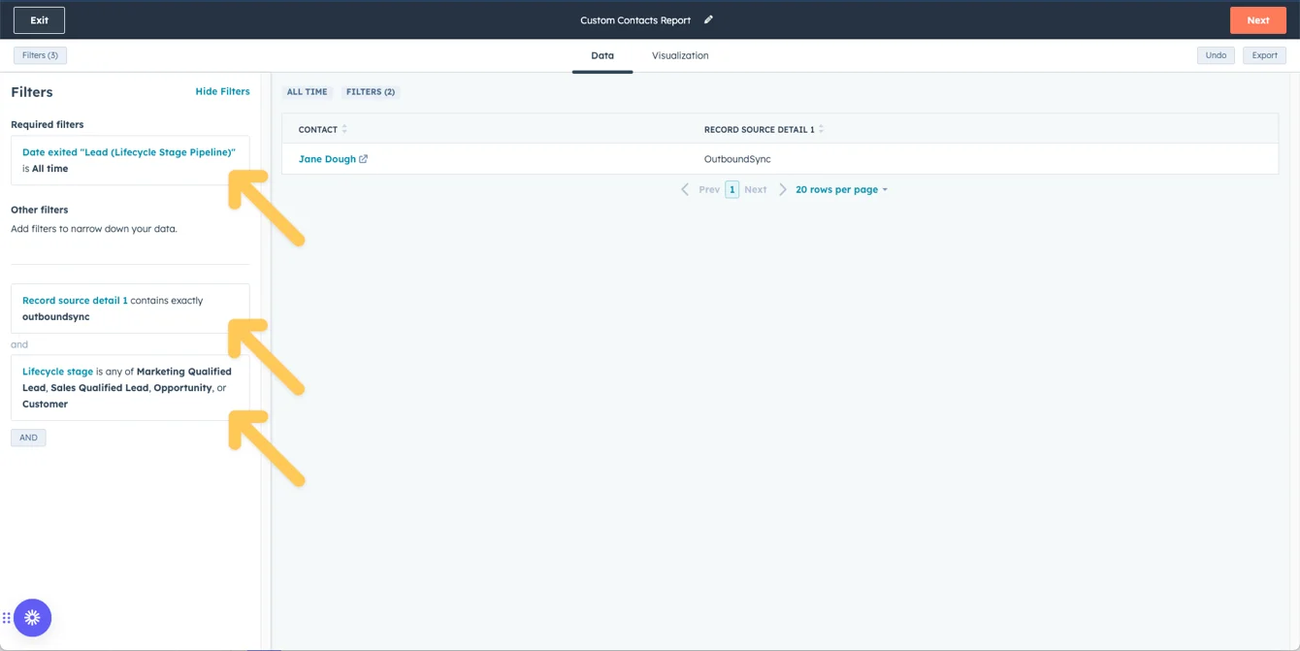
Configure the Filters
Go to the Filters button in the top left corner. Update the Filters so they reflect what's shown below, these include:
- Required filters
- Date exited "Lead (Lifecycle Stage Pipeline)" is all time
- Other filters
- Record source detail 1 contains exactly outboundsync
- Lifecycle stage is any of Marketing Qualified Lead, Sales Qualified Lead, Opportunity, or Customer
Updating the Visualization
Now, click the Visualization tab and let's configure the chart type and which data we want to display in the report.
Select a Summary chart and then drag/drop the Count of contacts value into the Displaying part of the Configure summary chart section of the report builder.
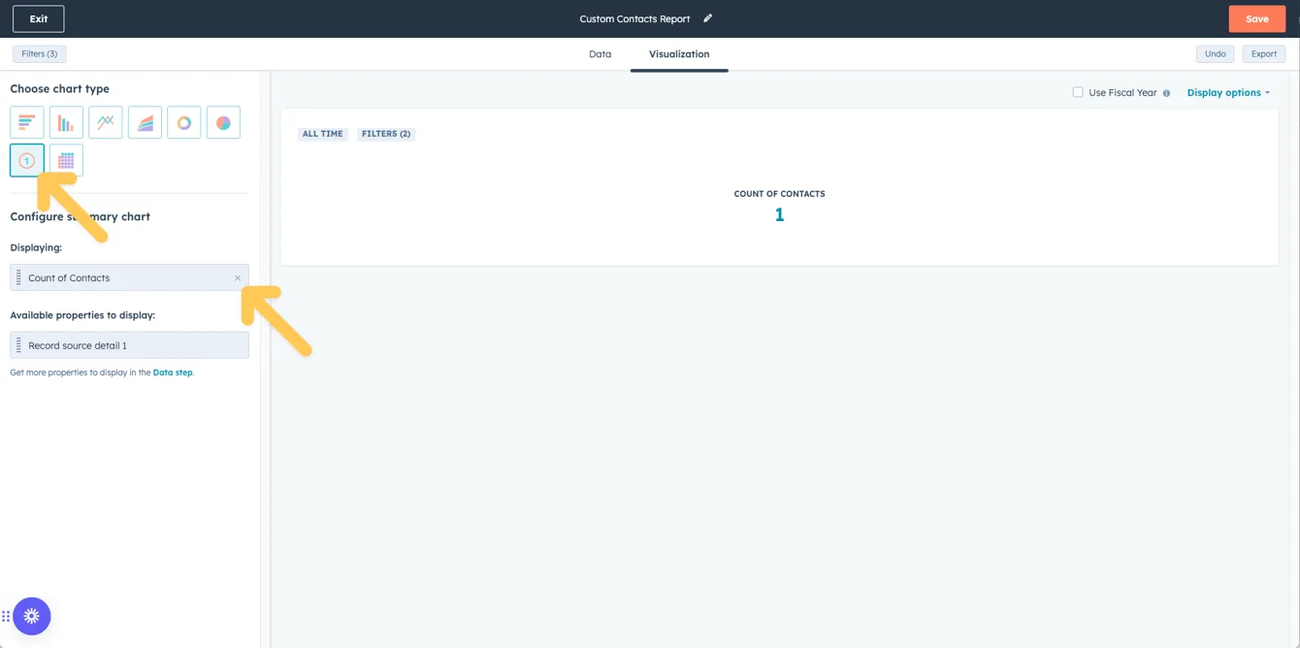
Finally, name your report and save it!
Multi-touch attribution
Now, let's build a report for contacts that have converted to an advanced lifecycle stage with any touch from an outbound campaign—rather than only requiring the first touch being from an outbound campaign. This can be considered outbound-influenced revenue.
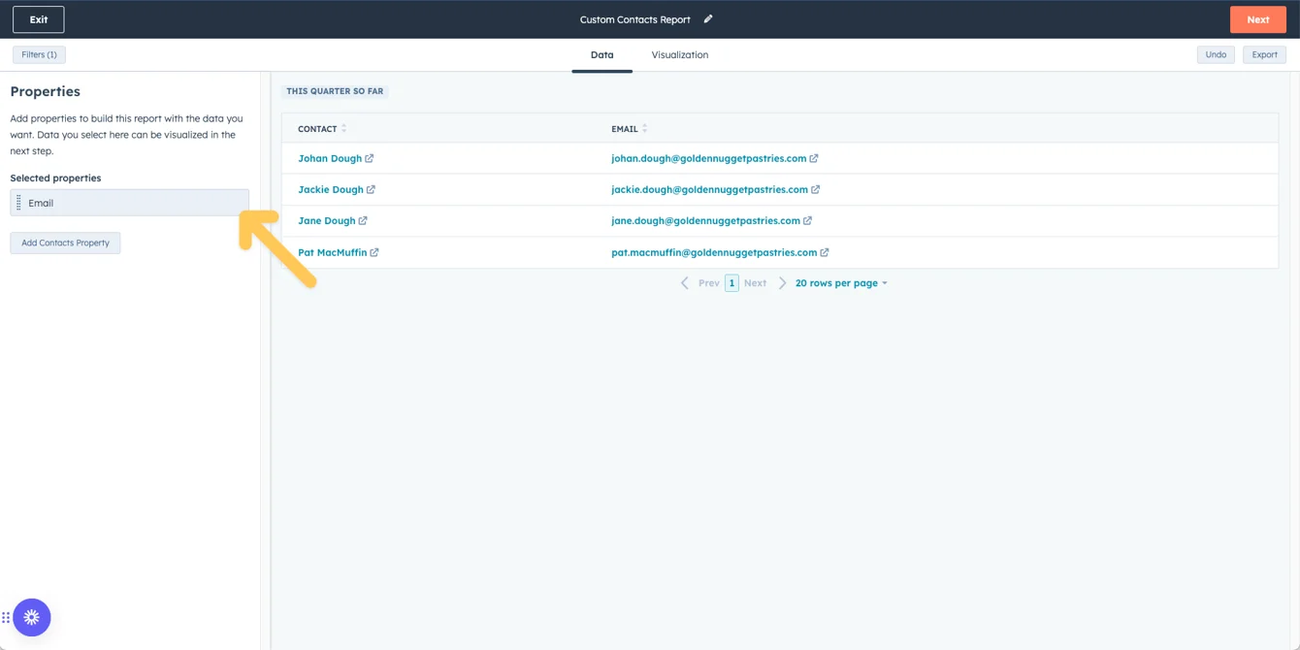
Configure the Data
In the Data tab, include only Email as one of the Selected properties. This will be useful for drilling down into the report after it has been created.
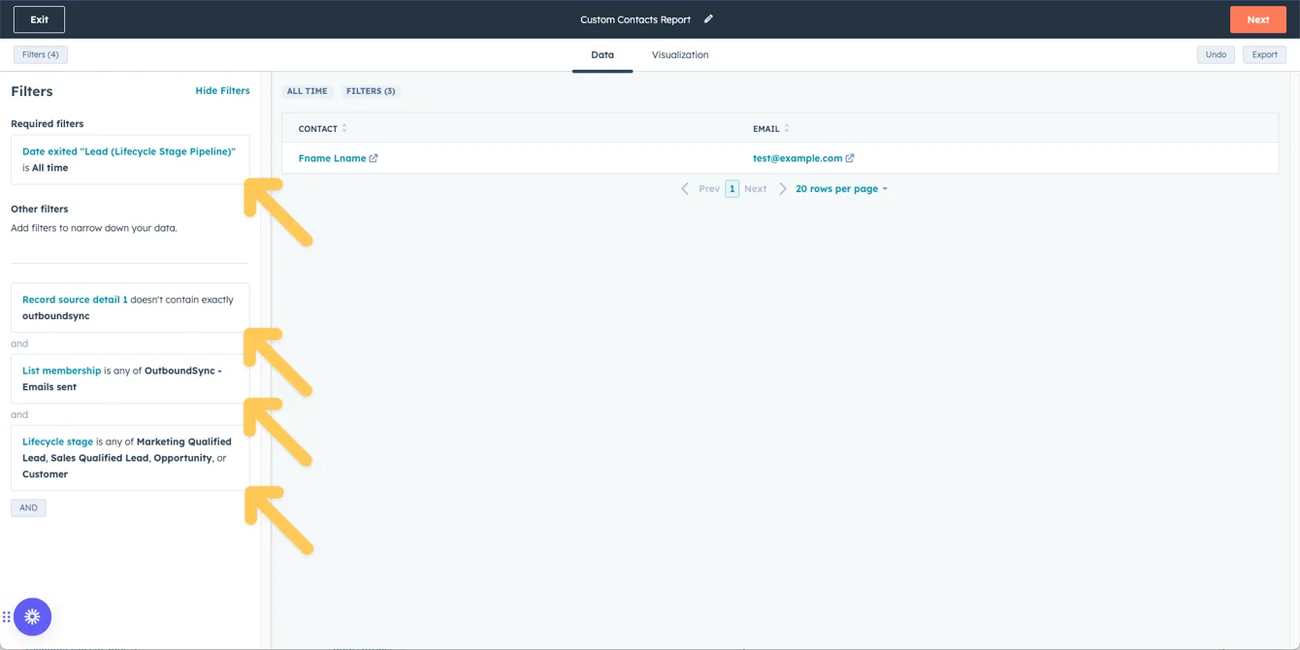
Configure the Filters section in your report
Go to the Filters button in the top left corner. Update the Filters so they reflect what's shown below, these include:
- Required filters
- Date exited "Lead (Lifecycle Stage Pipeline)" is all time
- Other filters
- List membership is any of OutboundSync - Emails sent
- Lifecycle stage is any of Marketing Qualified Lead, Sales Qualified Lead, Opportunity, or Customer
The Multi-touch method of counting will necessarily overlap with the First touch method outlined earlier in the article. If you wanted them to be mutually exclusive where you are counting ones that had a different original source, you could include the filter: Record source detail 1 is not equal to any of outboundsync.
The List membership filter is using another method, besides Record source detail 1, to determine how a Contact landed in HubSpot from a source besides OutboundSync. See how to build lists like this here .
Updating the Visualization
Now, click the Visualization tab and let's configure the chart type and which data we want to display in the report.
Select a Table chart and then drag/drop the Email value into the Displaying part of the Configure table section of the report builder.
Lastly, drag/drop Count of contacts into the Measured by part of the Configure table section of the report builder.
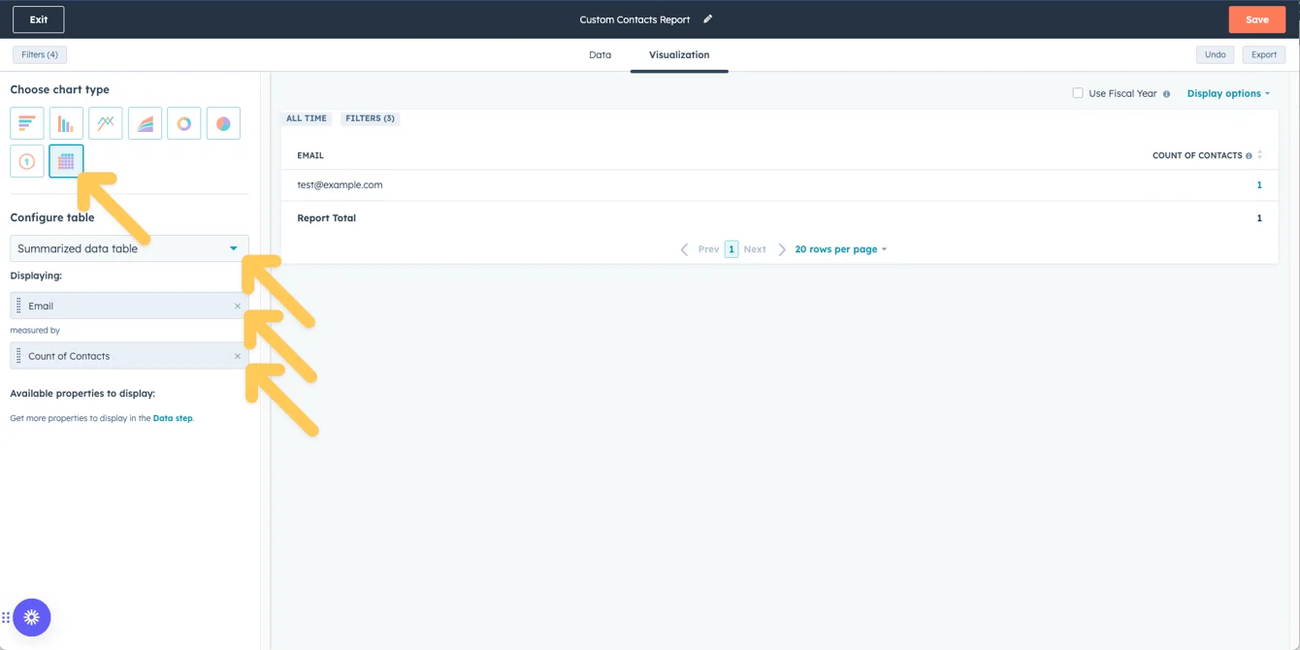
Finally, name your report and save it!
Final considerations
Creating a dashboard
If you don't already have one, you may want to create a dashboard in HubSpot specifically for OutboundSync reports.
Applying more precise filters
There are more filters you may want to add:
1. Customers: You may have emailed current customers by accident, particularly if you do not have block lists set up correctly. You may add a criteria that filters this out based on the time to conversion.
2. Bounces: You may add filters to remove contacts that have had any type of bounced email. Keep in mind that a subsequent proper address may have been found and records may have been merged.
3. Timing: You can add filters to only count contacts that have converted within a given time-frame, such as this month, the last 90 days, etc. These reports show all-time conversions.
4. Companies: You may want more of an account-based look at accounts or companies that have converted as a result of your campaigns. These answer different but similar questions to what these contact-based reports reveal.