Sending test webhook payloads
Last updated January 13, 2026
OutboundSync’s Testing Modal allows you to generate and send sample webhook payloads to your CRM so you can validate how data is received, mapped, and used in lists, workflows/flows, and reporting, before real data is sent.
An active subscription is not required to use the Testing Modal. Trial or non-active accounts can use the Testing Modal to send sample payloads and evaluate how OutboundSync data would appear in their CRM. Live syncing from sequencers is only available for active accounts.
Why use the Testing Modal?
The Testing Modal is designed to help you safely simulate real-world activity without waiting for live events. Common reasons to use it include:
- Verifying how OutboundSync events are received and stored in your CRM
- Testing CRM workflows (HubSpot) or flows (Salesforce)
- Validating reporting before production data begins syncing
- Confirming contact properties, activity records, and associations are being created correctly
The Testing Modal is most commonly used for an initial push of sample data to confirm your setup is working as expected.
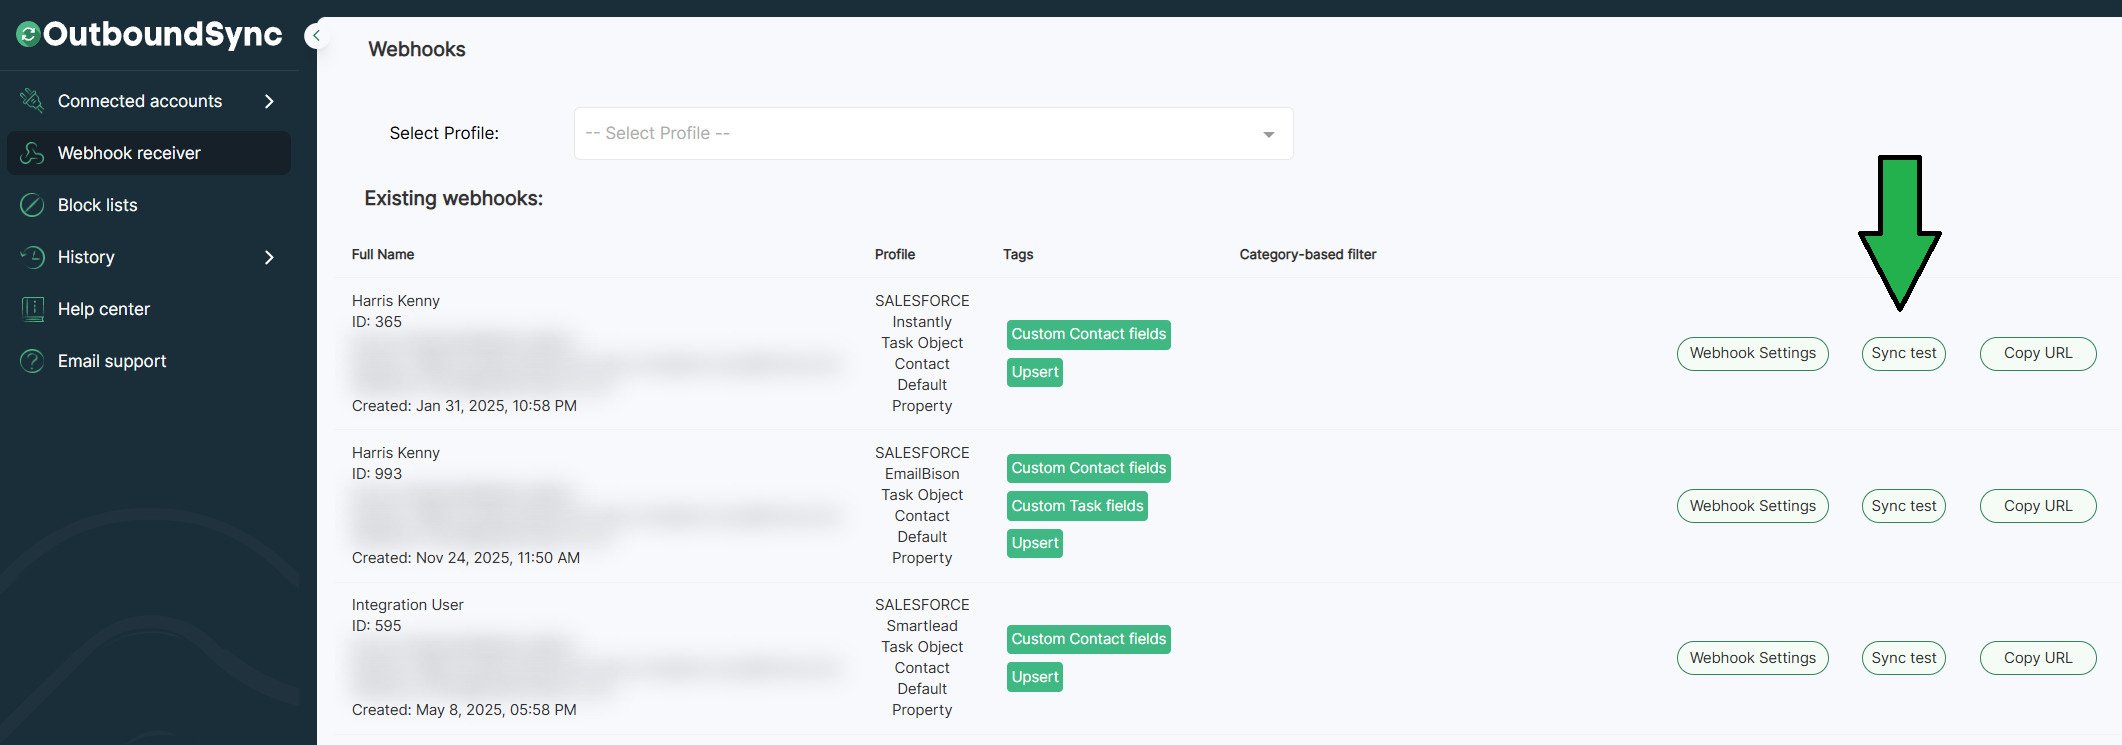
How to access the Testing Modal
- Log in to OutboundSync
- From the left sidebar, navigate to the Webhook Receiver tab
- Select an existing webhook or create a new one
- Click Sync Test on the webhook you want to test
This will open the Testing Modal.
Using the Testing Modal
The Testing Modal is designed to be quick and intuitive. Most tests can be sent in just a few clicks.
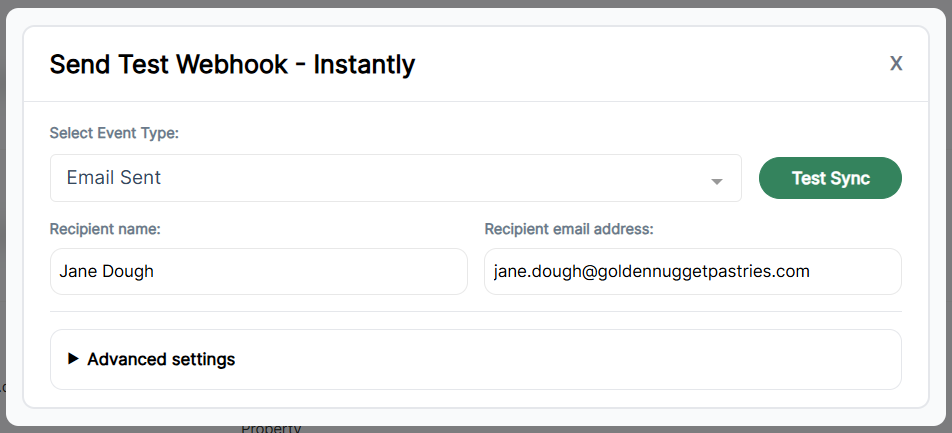
Step 1: Choose the event
Select the event you want to test using the Select Event Type dropdown.
The available events are determined by the sequencer connected to the webhook (Smartlead, Instantly, EmailBison, or HeyReach). Only events that OutboundSync supports for that sequencer will appear.
Once selected, OutboundSync automatically generates a sample payload that mirrors a real event.
Step 2: Choose the test contact
The Testing Modal is pre-filled with a default testing contact:
- Jane Dough
- jane.dough@goldennuggetpastries.com
You can use this contact as-is or replace it with your own test data.
- Recipient name – Sets the contact name in your CRM
- Recipient email address – By default, email is used as the unique identifier to look up contacts in your CRM. Unless this is changed on the webhook, this field determines whether a contact is created or updated and ensures activity is associated with the correct record.
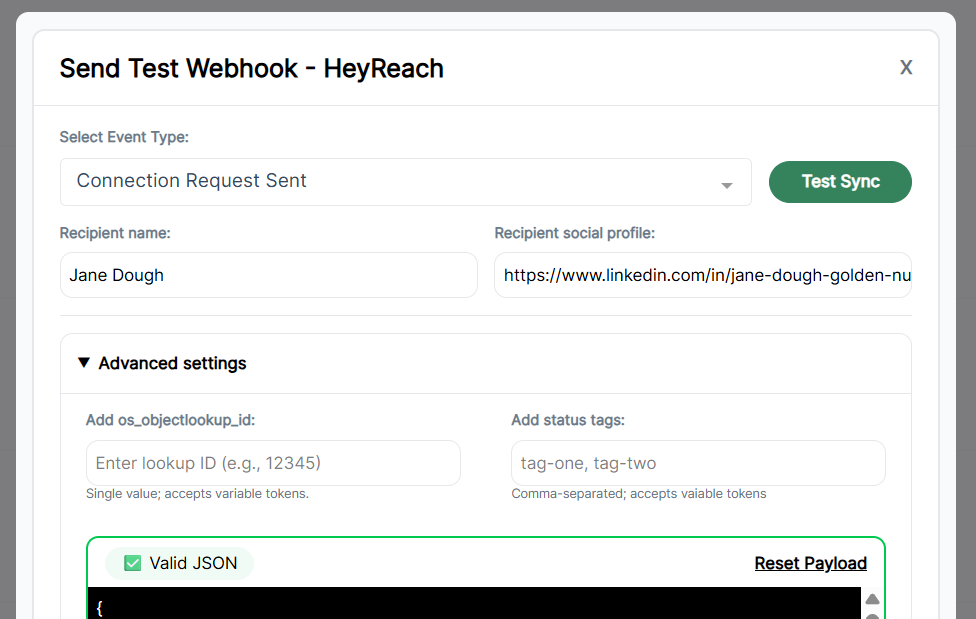
For HeyReach webhooks, the Recipient Email Address field is replaced with the Recipient Social Profile, which is used as the primary identifier instead of email.
Any changes you make here are reflected directly in the test payload.
Step 3: Advanced settings (optional)
Most users do not need to use advanced settings. Advanced settings are available for users who want deeper control over the test payload.
To access advanced options, expand the Advanced Settings dropdown.
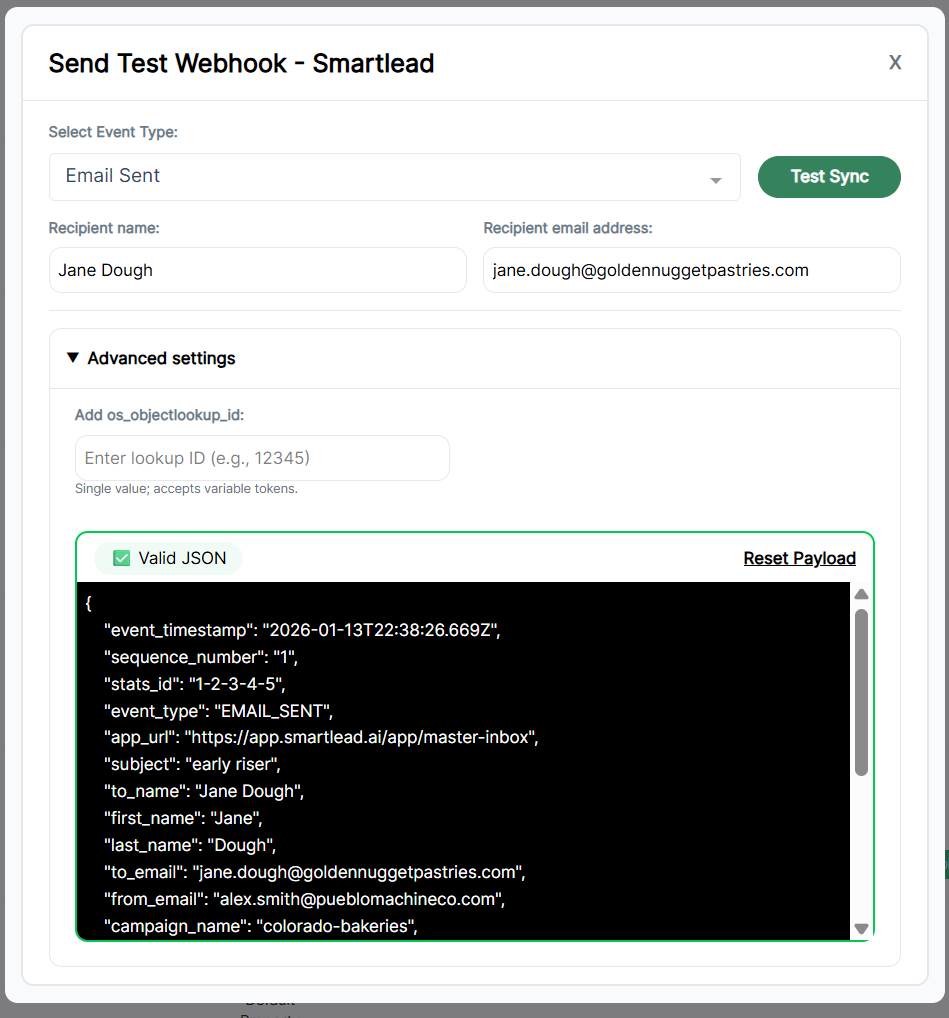
Payload JSON
- Shows the exact JSON payload that will be sent to your CRM
- You can edit the payload to test edge cases or custom scenarios, but the structure should continue to mirror the payloads normally received from the sequencer
- Built-in validation will alert you if the JSON is invalid before sending. Changes to field names or payload structure may cause the sync to error
Reset payload resets the JSON back to the default generated payload for the selected event.
Custom lookup object (Add os_objectlookup_id)
- Optional field used only when testing custom lookup objects
- Required only if your webhook depends on this lookup method
Status tag (HeyReach only)
- Allows you to easily add status tags to the payload for testing
Step 4: Sending a test payload
When you are ready to send your test, click Test Sync.
You will see a notificationin the top right confirming that the payload was sent successfully.

Verifying test data in your CRM
After sending a test payload, verify the results in your CRM:
Check contacts and activity
- Confirm the contact was created or updated based on the lookup object
- Review associated activity records generated by the test event
Test workflows or flows
- Ensure your HubSpot workflows or Salesforce flows triggered as expected
- Confirm enrollment criteria, filters, and conditions match the test payload
Review reports
- Verify that sample activity data appears correctly in reports and dashboards
Review delivery logs
- Go to the History tab in OutboundSync to see the test delivery
- A successful test will show a successful status
- If there’s an error, review the response details to understand what failed
Tip: If you see an error, double-check that your webhook receiver is configured correctly and that any edits to the payload still match the expected event structure. Resetting the payload to the default version and retrying is often the fastest way to resolve issues.
Category Based Filter testing tips
Test before adding filters
Whenever possible, run a test before adding Category Based Filters to your webhook.
Test payloads follow the same rules as live data. If filters are added too early, your test events may be blocked and never reach your CRM.
If filters are already enabled
If your webhook already has Category Based Filters applied:
- Send a test payload for the Lead Category Updated event first
- This ensures the test contact meets the required category criteria so subsequent test events can sync successfully
Conclusion
The Testing Modal is a key tool for validating your OutboundSync setup. By sending controlled sample payloads, you can confidently confirm how data is received, stored, and used in your CRM, ensuring your workflows and reporting are ready before live data begins syncing.