Salesforce setup guide
Last updated December 20, 2025
Here is every step required to connect your new OutboundSync account with Salesforce (SFDC) and start syncing data.
This guide is broken into five major steps:
- Create client app in Salesforce: Create an external client app in SFDC.
- Connect app in OutboundSync: Connect your app.
- Create webhook in OutboundSync: Create a webhook receiver.
- Verify activity in Salesforce: Check your data synced and enable visibility.
- Connect Sales Engagement Platform: Add your webhook URL to get data.
This is designed to be self-guided for users creating a test account. However if you are interested in getting help from our team, please contact service@outboundsync.com .
Create client app in Salesforce
Before beginning, please note: You must have System Platform User permissions. Read more about setting up permissions here .
- Login to Salesforce.
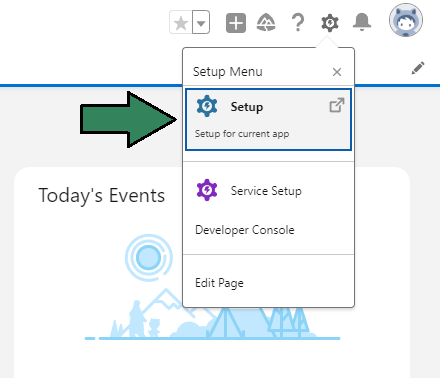
- Navigate to Setup Menu: Click the gear icon in the top right corner to access the Setup Menu. Click Setup
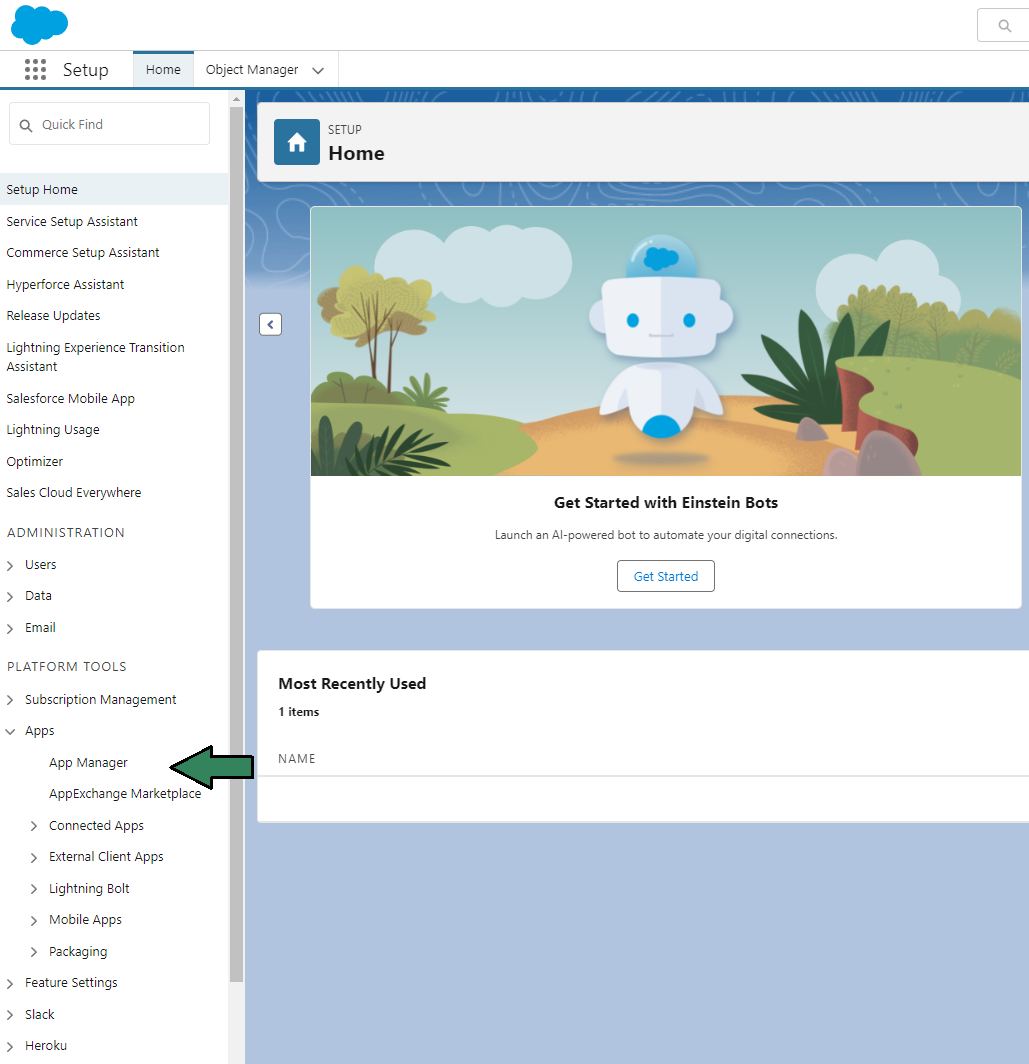
- Navigate to App Manager: On the left sidebar, under Platform Tools, go to Apps > App Manager.
If you do not see the App Manager option, contact your Salesforce Admin. You must have System Platform User permissions. Read more about setting up permissions here .
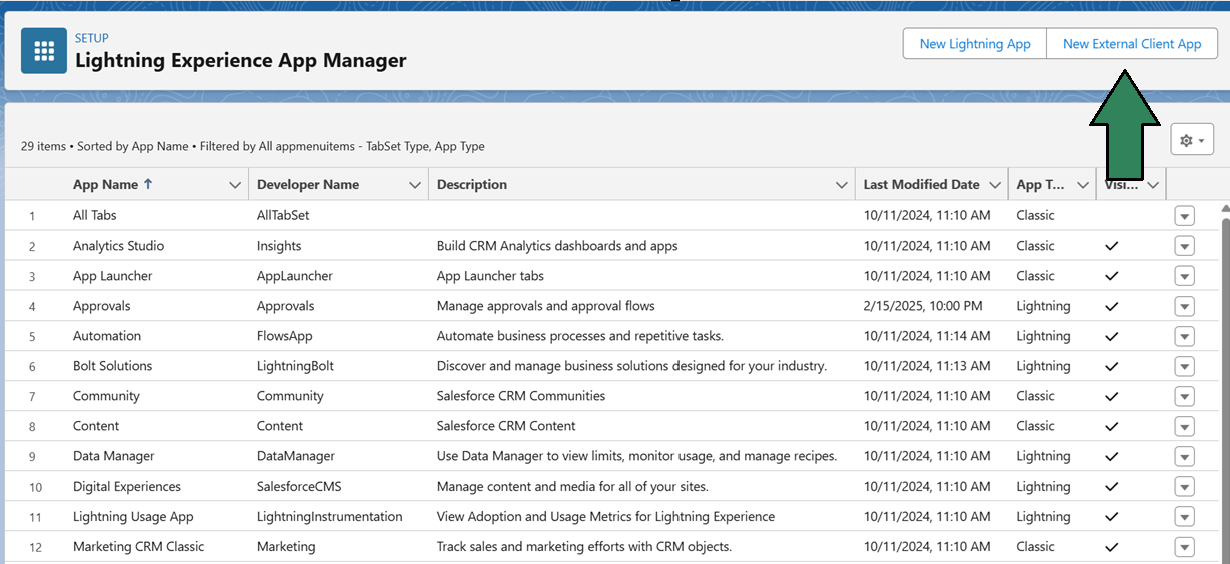
- Create a New Client App: Select New External Client App.
- Enter the following basic information:
- Connected App Name: OutboundSync
- API Name: OutboundSync
- Contact Email: Your preferred email (does this need to be your SFDC email address).

- Enter the following API information:
- Check the box for Enable OAuth.
- Enter the following Callback URL: https://app.outboundsync.com/oauth/salesforce
- Add the following OAuth Scopes:
- Full Access (full)
- Manage user data via APIs (api)
- Perform requests at any time (refresh_token, offline_access)
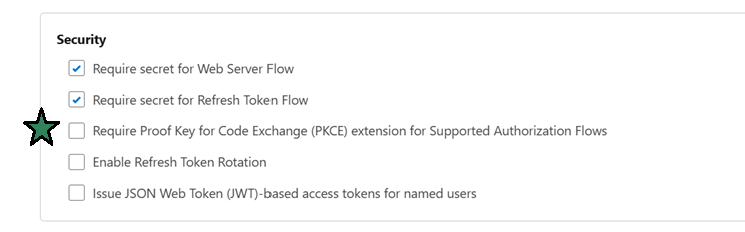
- Uncheck the box for Require Proof Key for Code Exchange (PKCE) Extension for Supported Authorization Flows.
- Click Save and then Continue.

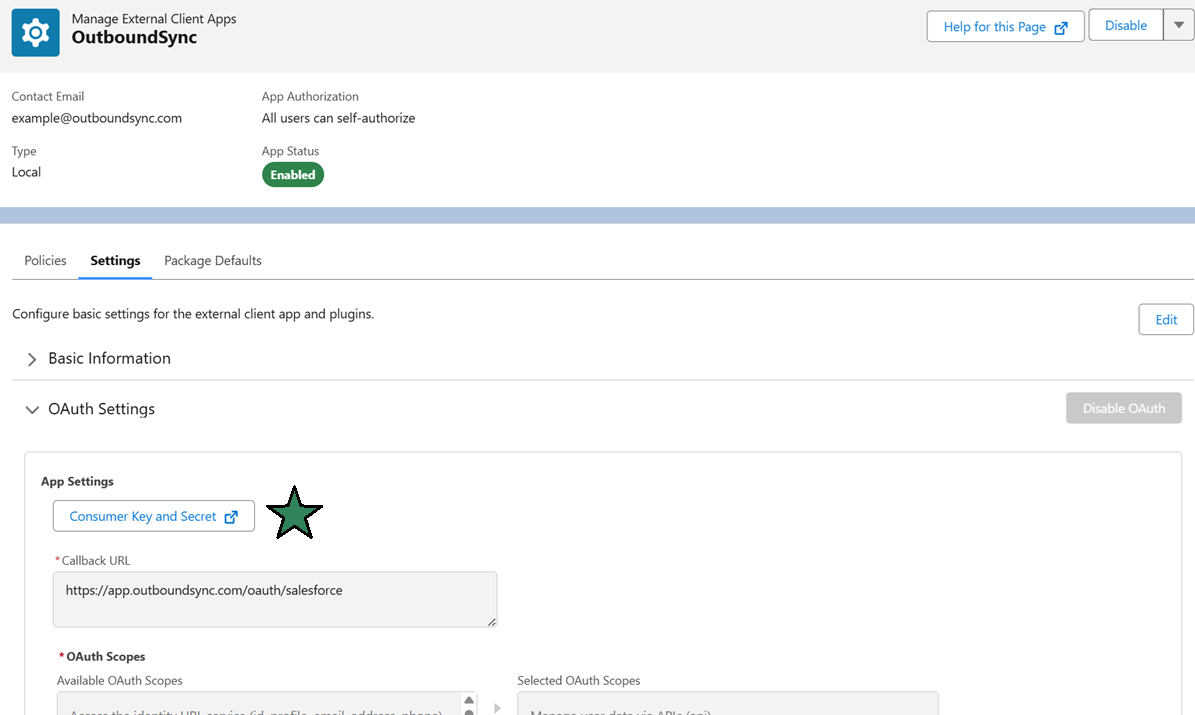
- Client App Settings
- Go to Settings > OAuth Settings and click on Consumer Key and Secret
- You will receive a verification code or 2FA, enter it to proceed.
- Now you can view the Consumer Key and Consumer Secret.
If you are unable to view the Consumer Key or Consumer Secret, this guide will walk you through the permissions required: https://help.outboundsync.com/articles/702451-unable-to-view-consumer-key-consumer-secret-in-salesforce
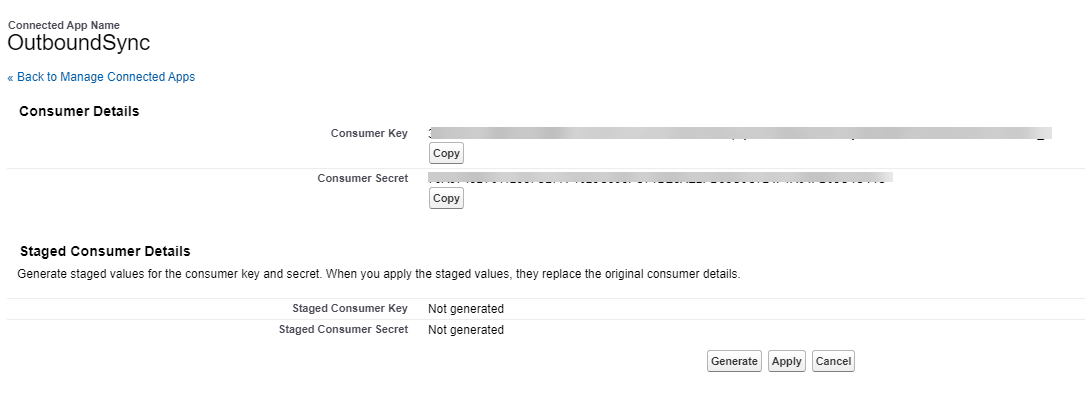
Keep this information nearby, we will enter it into OutboundSync next.
Connect app in OutboundSync
- Login to OutboundSync.
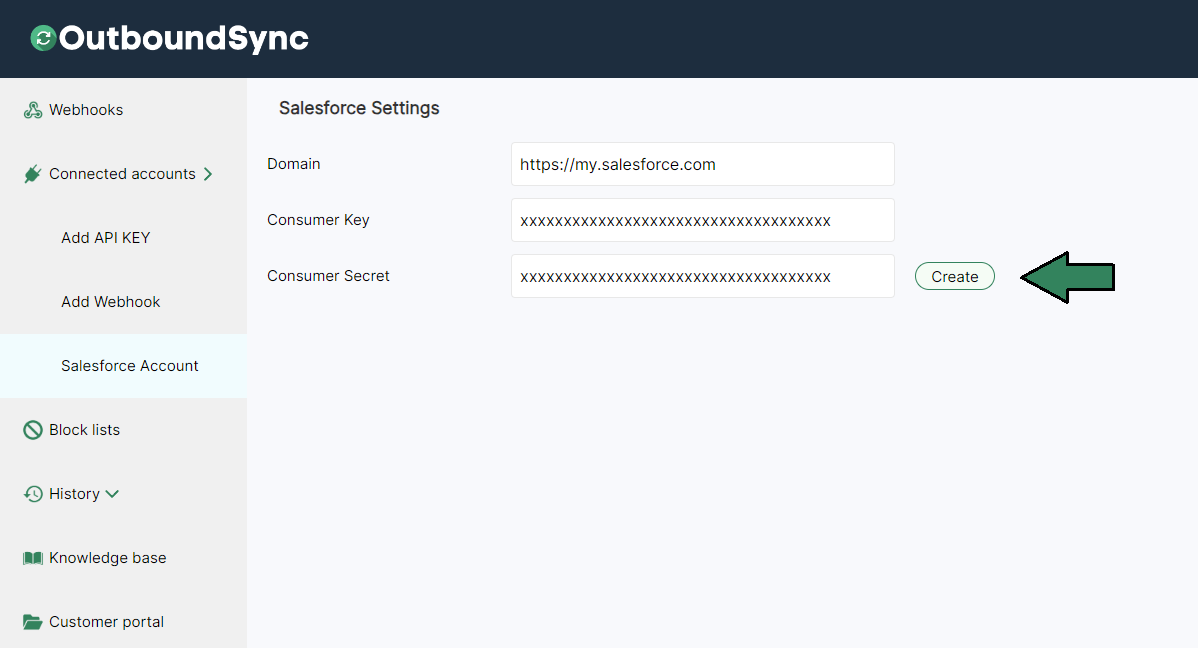
- Navigate to Salesforce Account:
- Go to Connected Accounts > Salesforce Account.
- Copy the Consumer Key and Consumer Secret from Salesforce and paste them into their respective fields in OutboundSync.
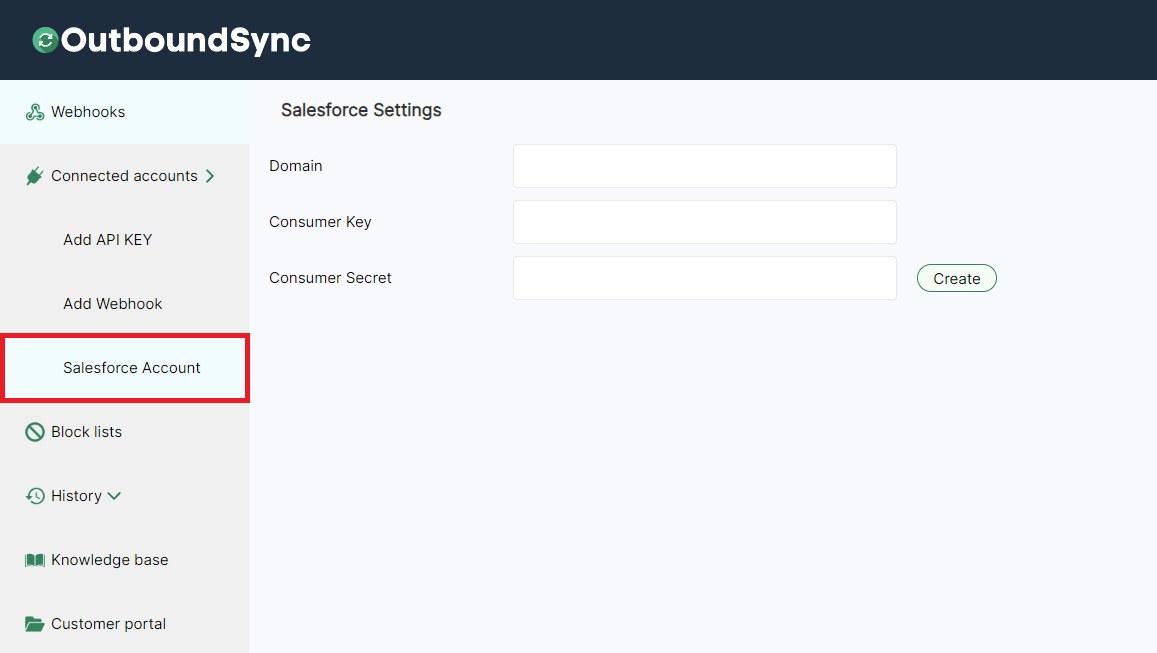
- Find Your Salesforce Domain: In Salesforce, click your profile image in the top right corner and copy the Domain URL under your name.
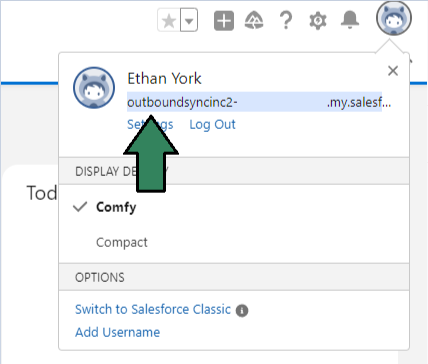
- Enter Domain URL in OutboundSync: Go back to OutboundSync and enter the Domain URL, adding https:// at the beginning.
For example: my.salesforce.com becomes https://my.salesforce.com
- Create the Connection: Click Create when you’ve entered all the criteria.
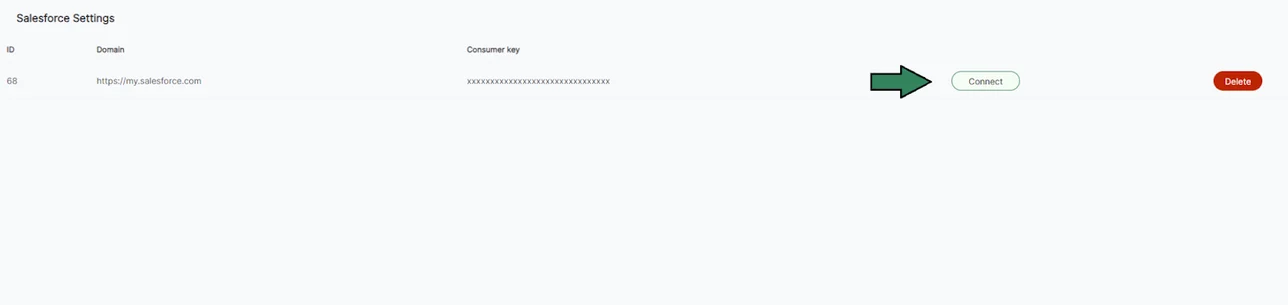
- Complete the Connection:
- Log out of any tabs you have open for Salesforce.
- Click Connect on the newly added Salesforce account in OutboundSync. This will prompt you to log in to Salesforce.
- Select Allow on the list of permissions.
Create webhook in OutboundSync
Create a Webhook receiver
In OutboundSync, go to the Webhook receiver tab.
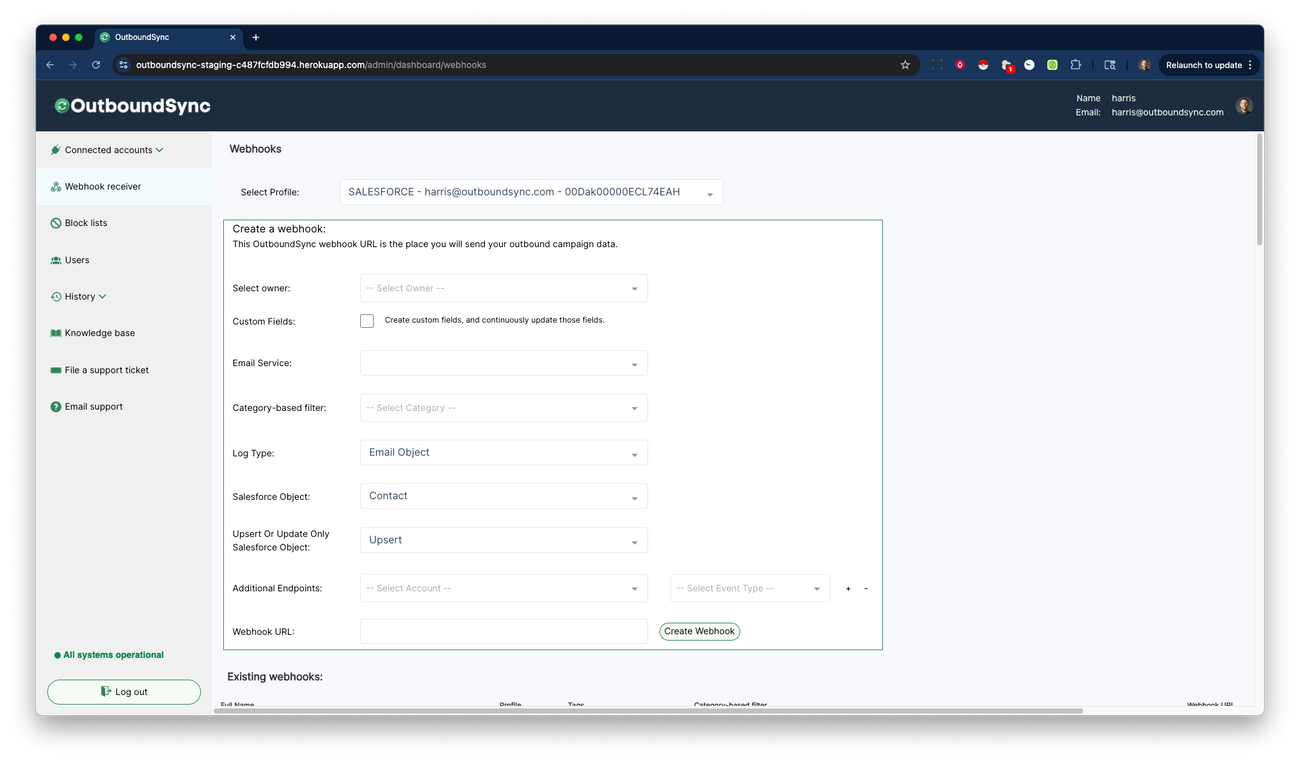
- Select account: Select your Salesforce account from the dropdown.
- Select owner: The owner is the Salesforce user that newly assigned leads, accounts, and contacts will be assigned to by default. This can be a person or it can be an integration user that is created specifically for OutboundSync.
- Custom Fields: Optionally, OutboundSync has the ability to create and write to a group of custom fields with metadata related to your campaigns. You can also select which objects you want to write those fields to (e.g. Contact, Lead, or Task). We highly recommend performing this action with System Administrator-level permissions.
- Select Email Service. This is your Sales Engagement Platform (e.g. Smartlead, Instantly, EmailBison).
- Select Salesforce Object. You can log activities as either Tasks or EmailMessages.
- Task Object (Recommended): When writing to the Task Object , you can log data with a user-configurable subject line that can be used for Flows and Reports. While counterintuitive based on the name "tasks", this is the method that most integrations use in Salesforce in general.
- EmailMessage Object: This object is more intuitively named and for smaller organizations, it may be preferred. Note that when writing to the EmailMessage Object , it has fewer options when it comes to Flows and Reports. However the metadata provided by this object is also more clear to a user and in some cases—especially for
EMAIL_SENTandEMAIL_REPLY- it is more intuitive that these be logged as emails.
- Upsert or Update Only Salesforce Object: If you select Upsert, it means you want OutboundSync to search for Leads or Accounts/Contacts, and either update them if one is found or create a new one if one is not found. Update Only means that OutboundSync will search and will only update existing Leads or Accounts/Contacts.
If you select Upsert, OutboundSync will try to find Contact or Lead by ID, and then by email as a fallback, and ultimately create a new Lead or Contact if no results are found. If you select Update Only, OutboundSync will only search and update existing Leads or Contacts.
- Select additional endpoints. This is built for Smartlead users due to constraints on the number of permitted webhooks. Read more about how additional endpoints work here .
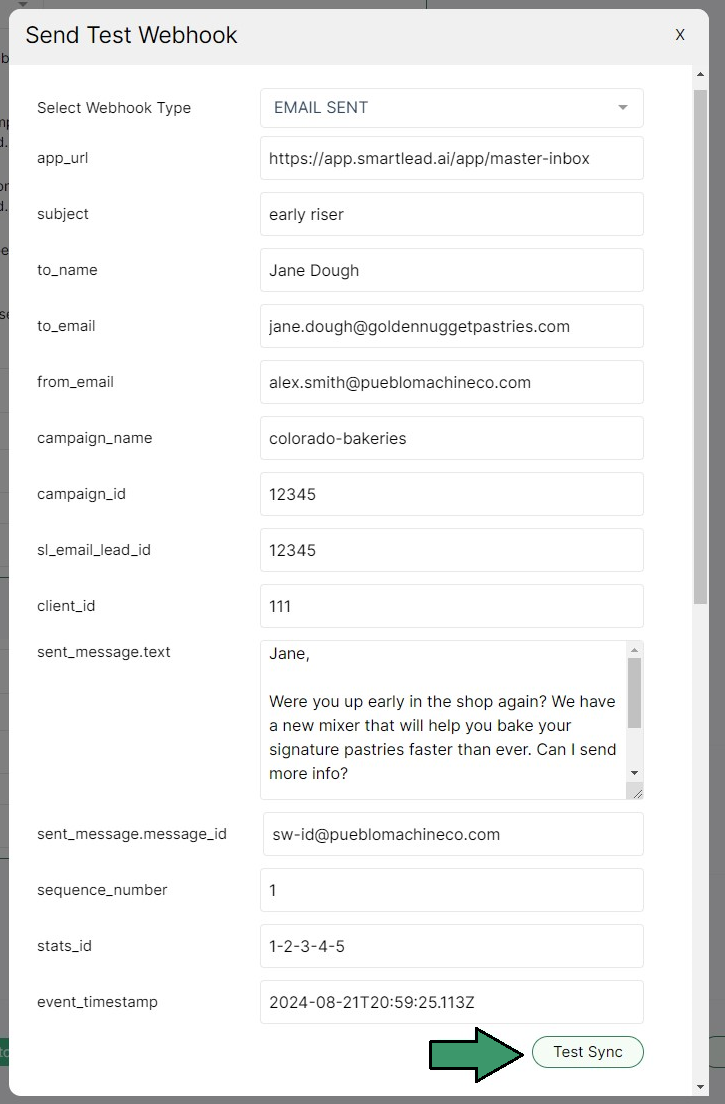
Send a test webhook payload
We'll see this in Salesforce later. But while we're here in OutboundSync, click the Sync Test button to send a test webhook payload over to your Salesforce account.
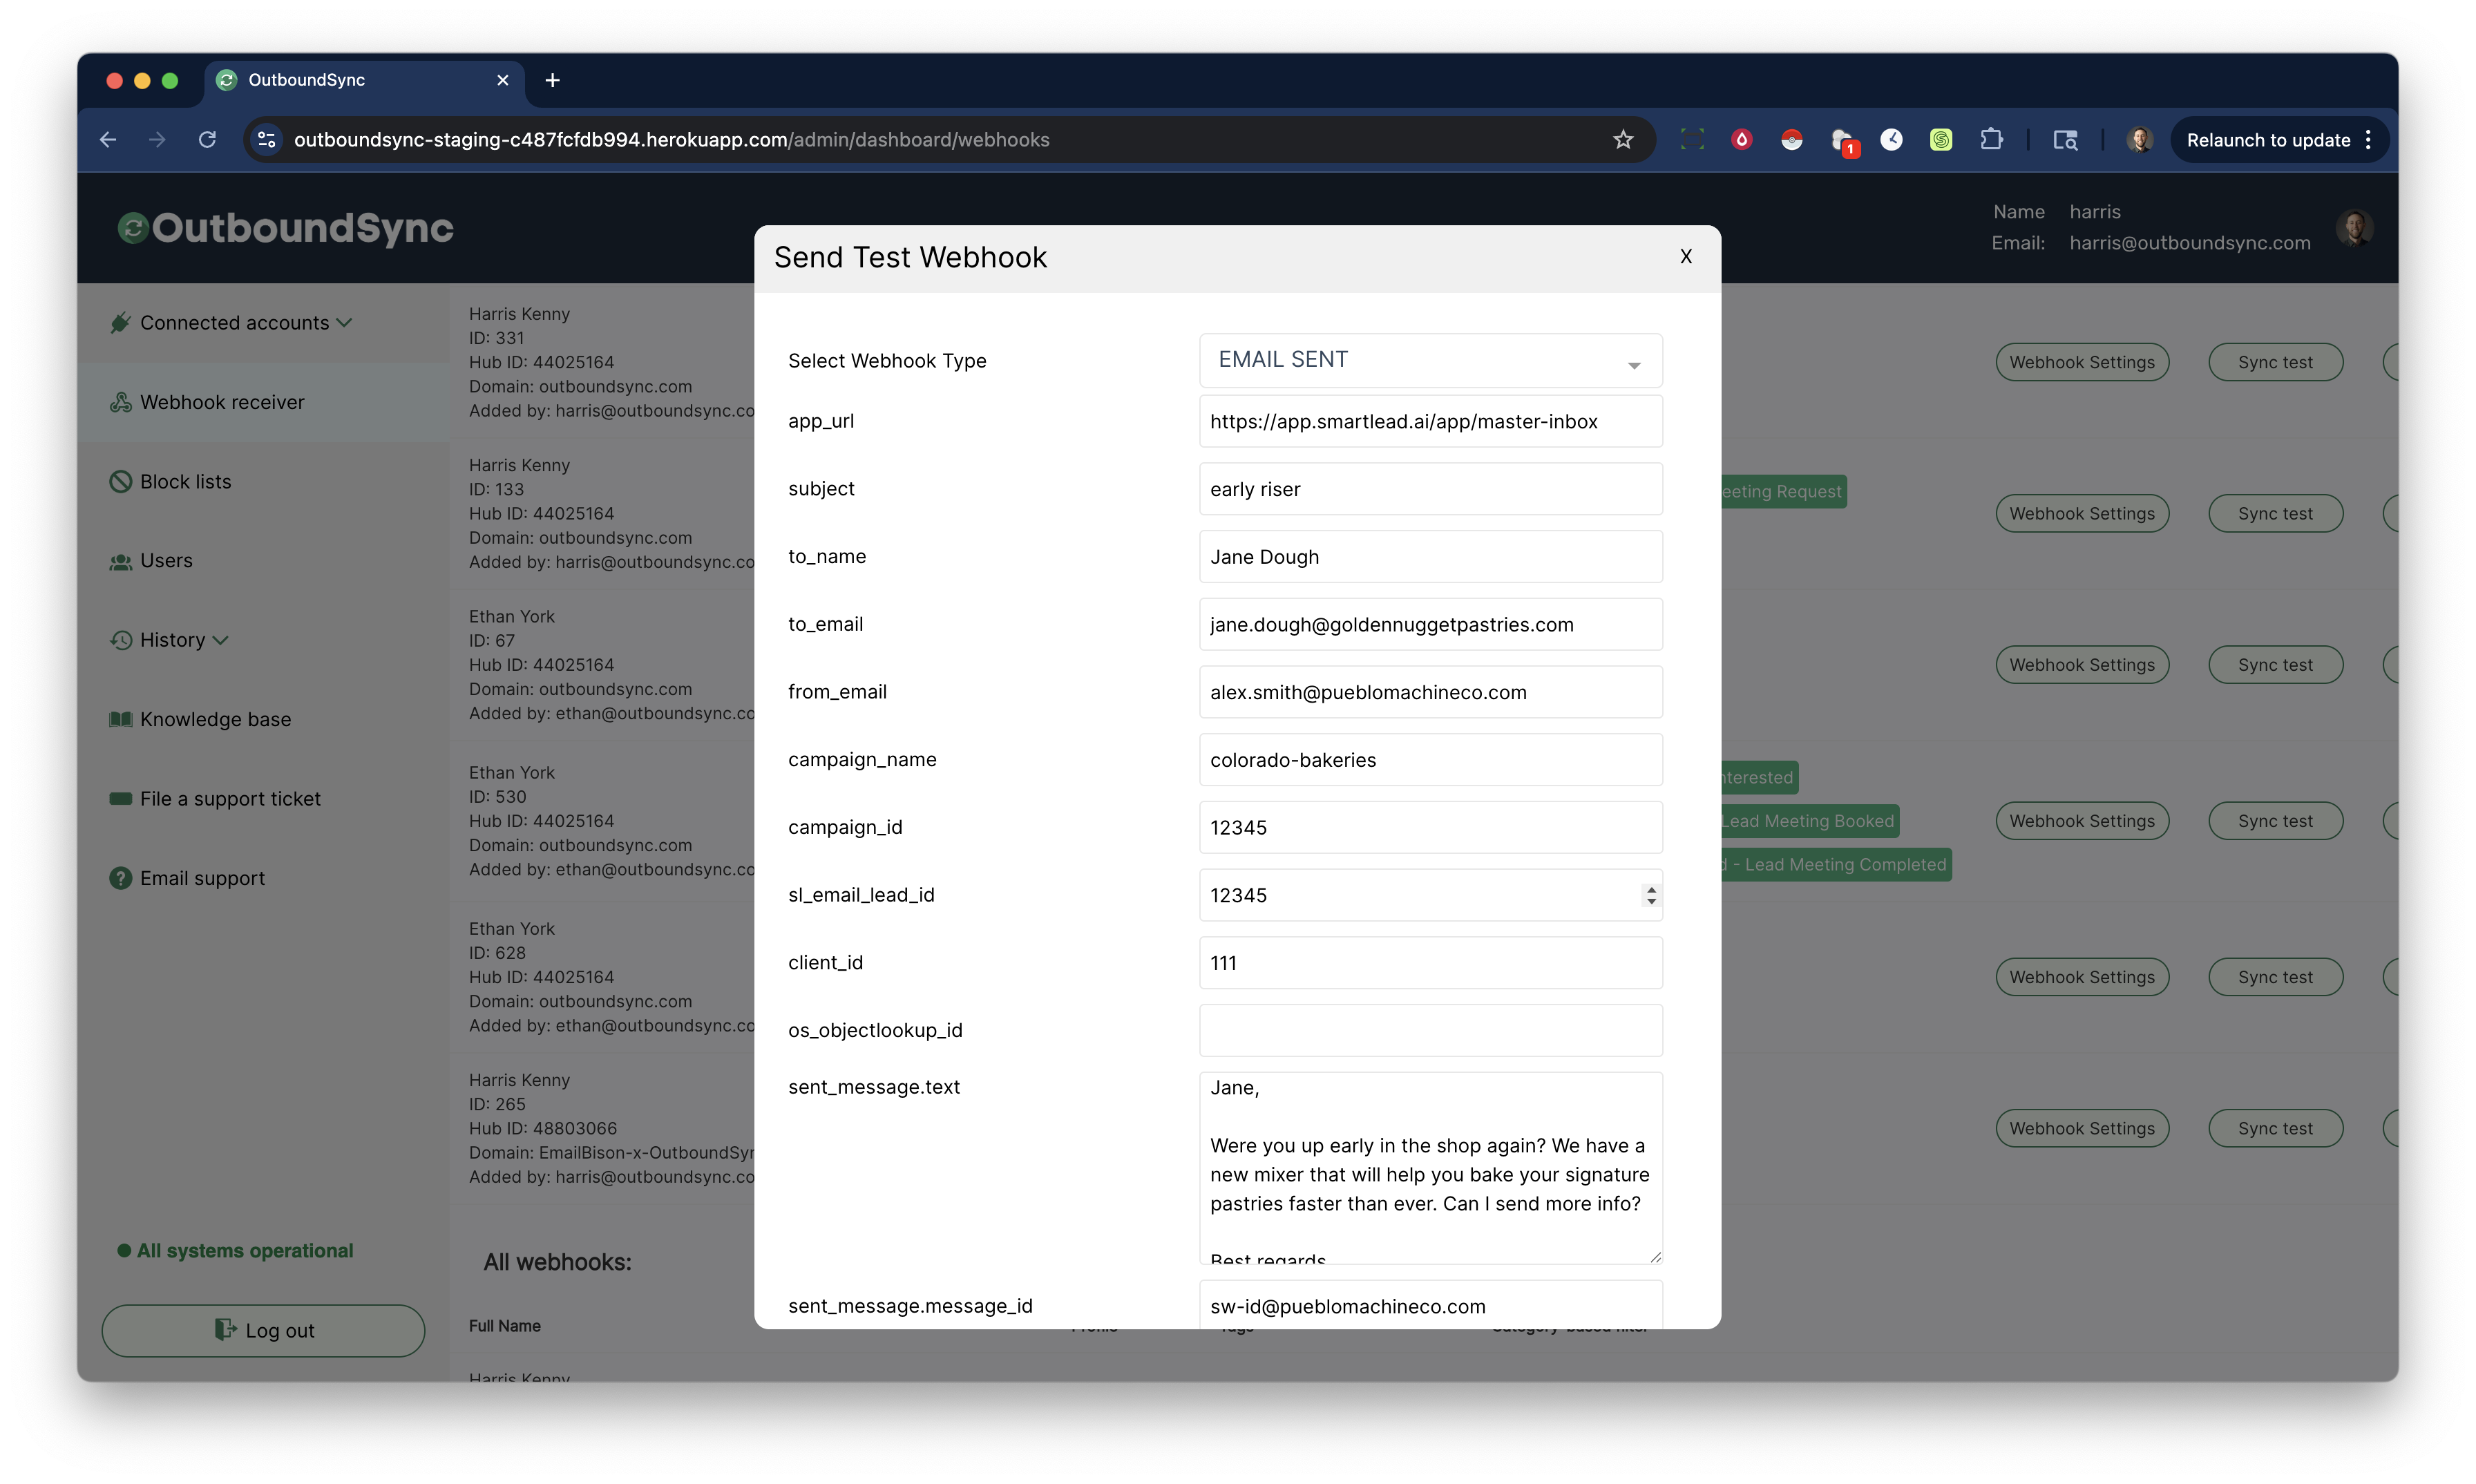
Configure the payload if you want to modify it, or just scroll down and click Test Sync to send it.
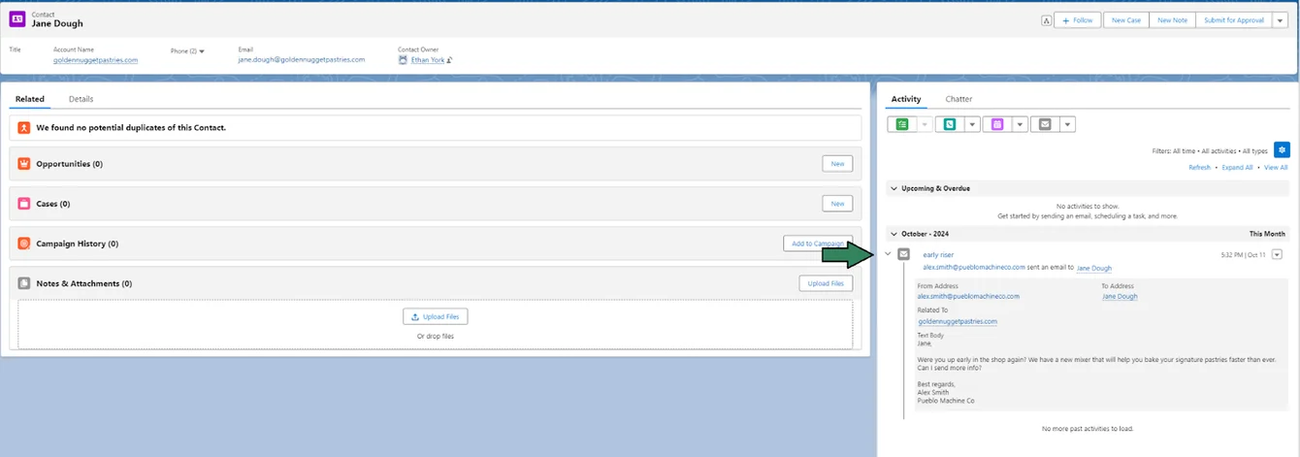
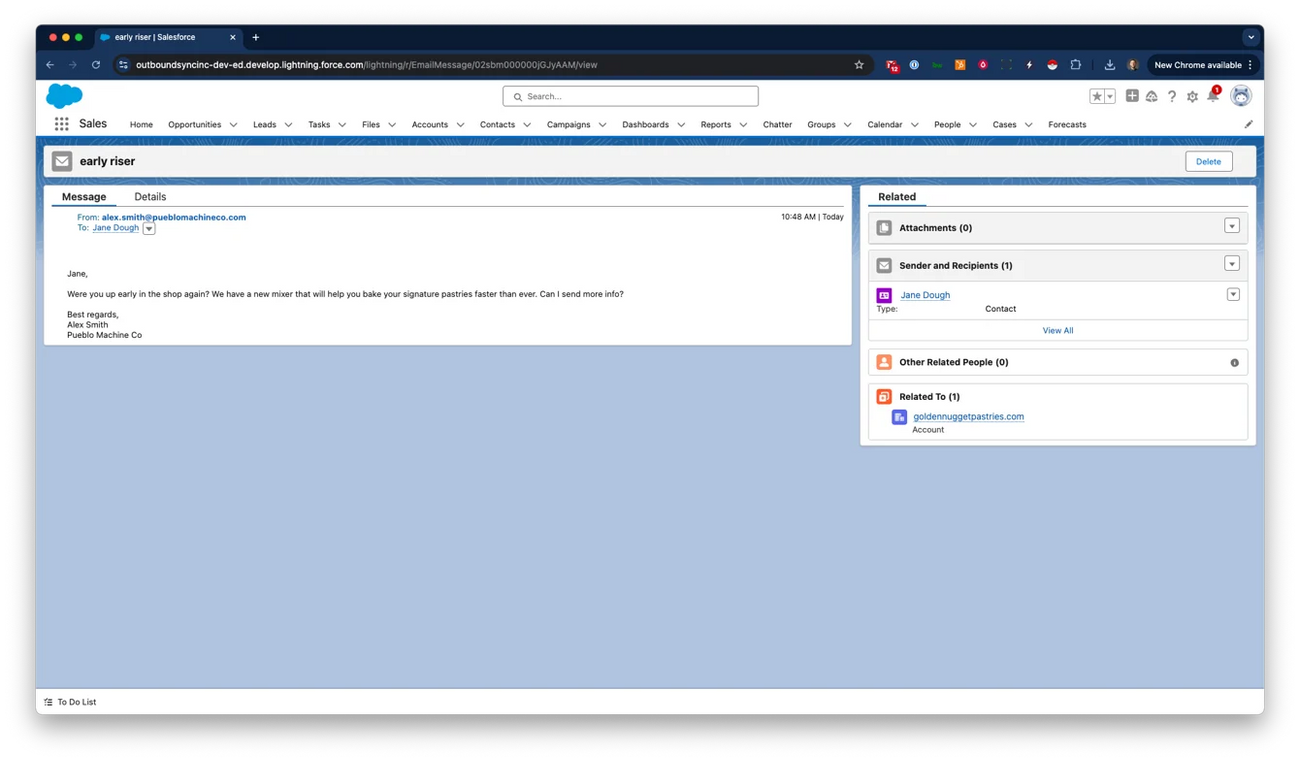
Verify activity in Salesforce
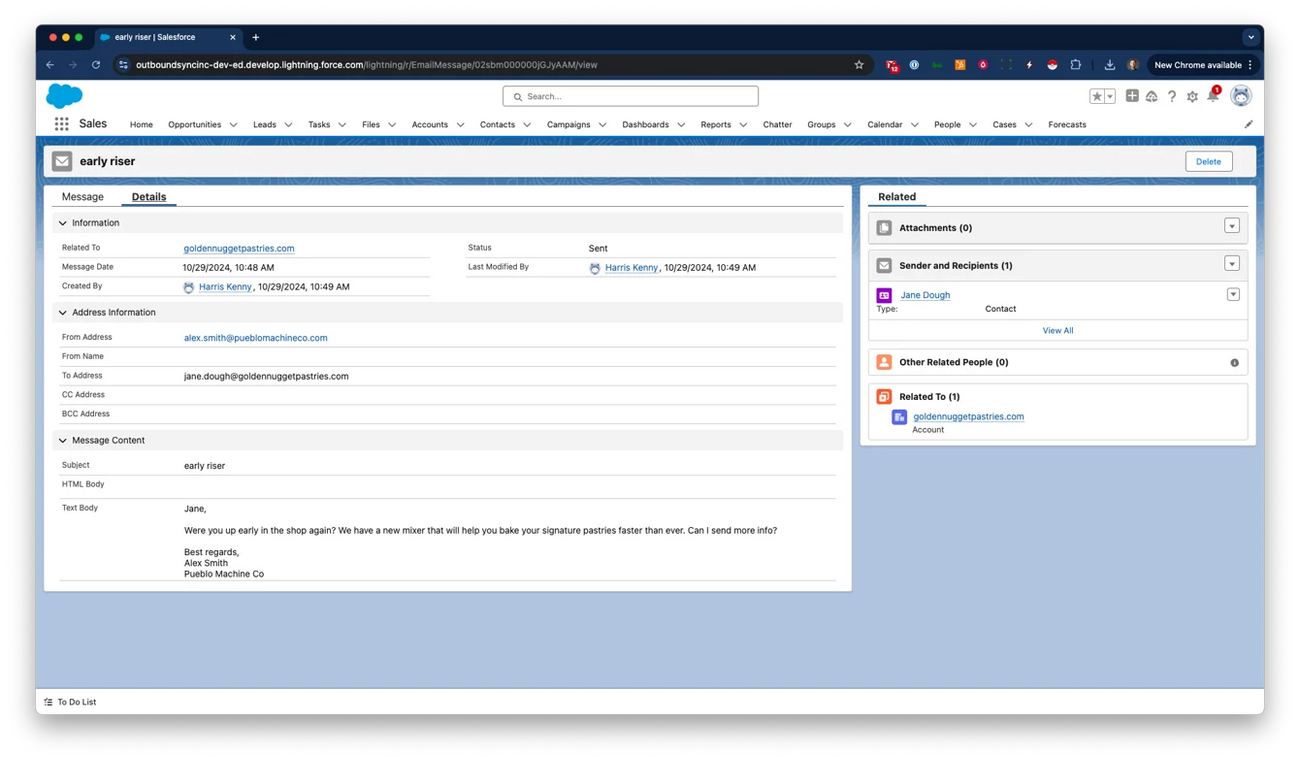
First, go to Salesforce and search for the contact used in the test.
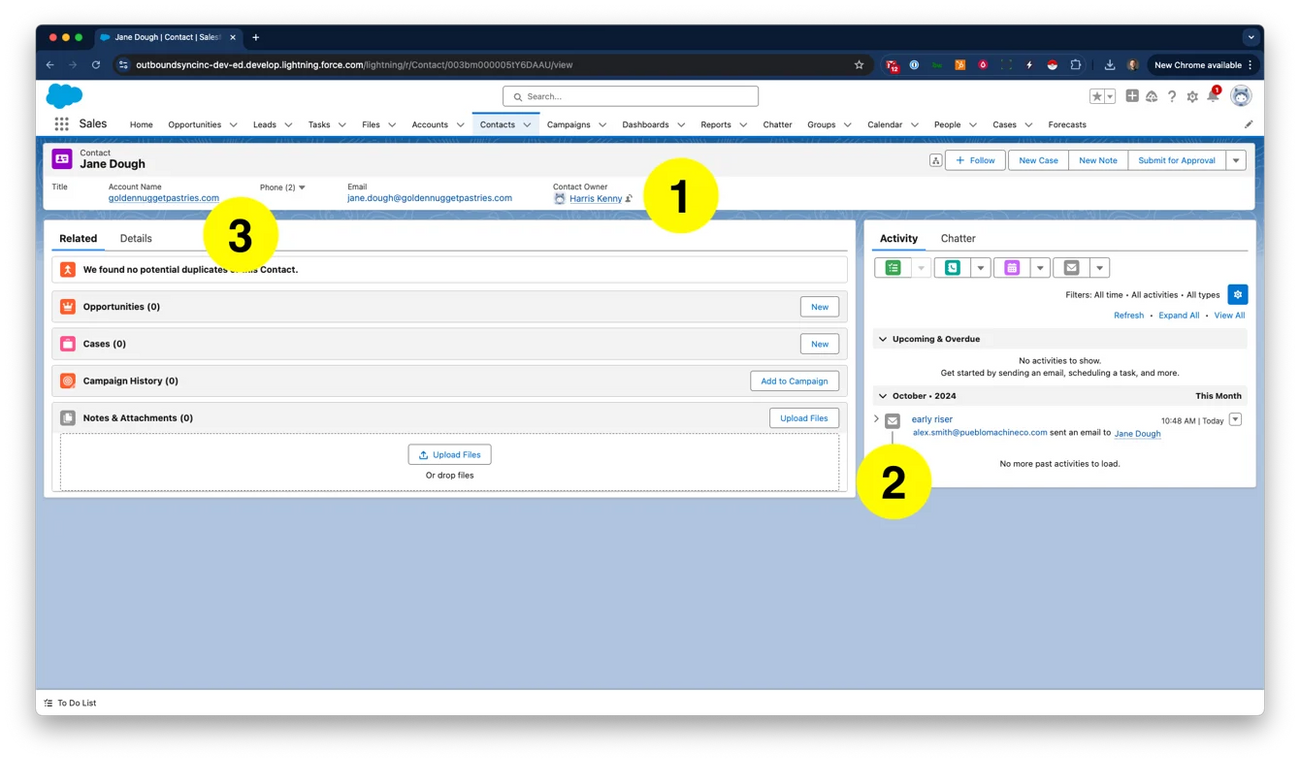
Next, open the contact in Salesforce and view their Activity to ensure everything synced correctly.
Connect Sales Engagement Platform
To finish the process, add the newly created OutboundSync webhook URL into your Sales Engagement Platform.
Find instructions on how to do with with the following supported platforms:
It is vital that you properly add and configure your webhook in your Sales Engagement Platform. If you don't do this, OutboundSync won't receive data and your data will not show up in Salesforce.
This is simply a reference guide. All OutboundSync customers will receive a step-by-step onboarding plan when they sign up.